Creating a home that feels both welcoming and stylish can be a challenge, especially when dealing with imperfections like rough drywall seams. This is where ceiling crown molding steps in as a fantastic solution. I created this post to share ideas that not only enhance your home décor but also effectively hide those annoying drywall flaws. Crown molding serves as more than just an aesthetic element; it’s a practical way to elevate your interior design while adding a touch of elegance to any room.
If you’re a DIY enthusiast or someone who simply loves home improvement, you’re in the right place. This guide is tailored for you, offering twelve creative ceiling crown molding ideas that fit perfectly in small spaces. You’ll discover options that blend time-honored styles with modern flair, ensuring there’s something for everyone. Whether you’re looking to revamp a room or complete a drywall repair, these ideas will inspire you to think creatively about your molding installation.
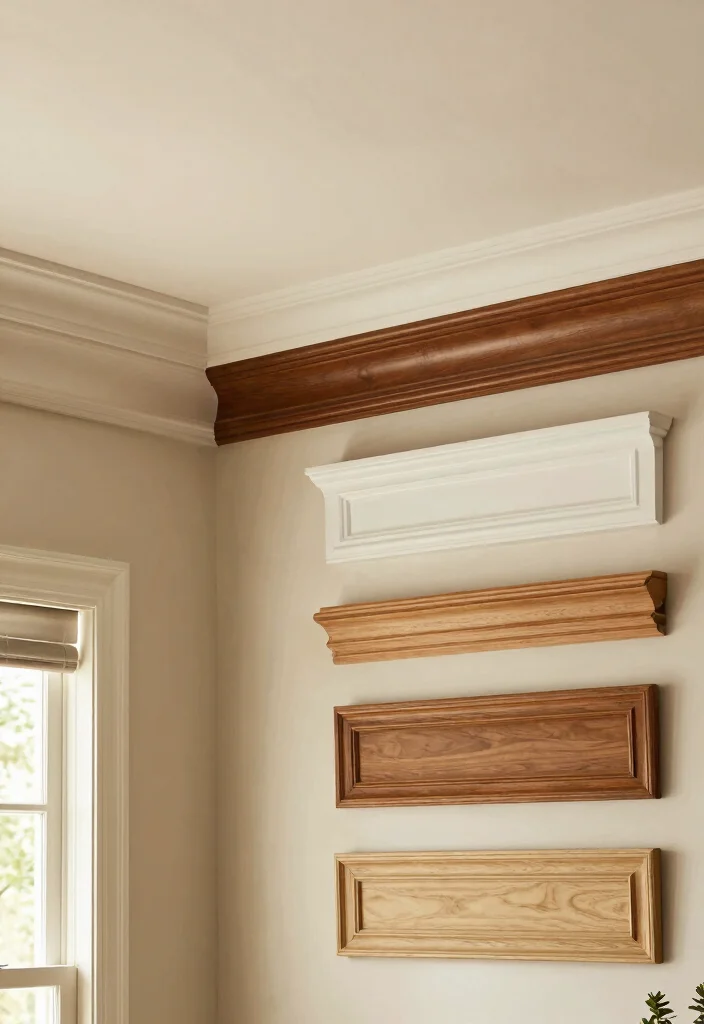
Get ready to explore different styles like classic white crown molding, farmhouse-inspired designs, and even eco-friendly options. Each idea is selected to not only look great but also to provide practical solutions for concealing those rough drywall edges. You’ll walk away with a treasure trove of inspiration that makes your home feel polished, coordinated, and ultimately, yours.
Key Takeaways
– Explore 12 unique crown molding styles that can effectively hide rough drywall seams while enhancing your home’s aesthetic appeal.
– Discover practical tips for installing crown molding in small spaces, tailored for DIY enthusiasts and beginners alike.
– Learn how different designs, such as farmhouse-style and minimalist options, can seamlessly blend with your existing interior décor.
– Gain insights into choosing the right materials and techniques for crown molding installation, ensuring long-lasting results.
– Uncover how decorative trim can not only conceal drywall imperfections but also serve as a statement piece in your home design.
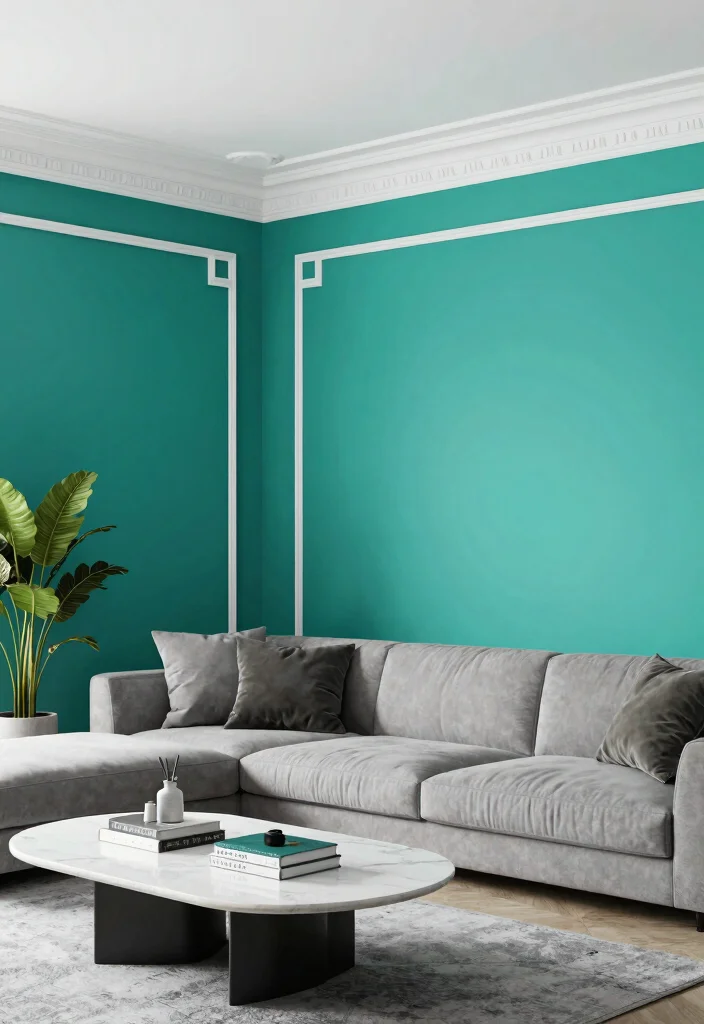
1. Classic White Crown Molding
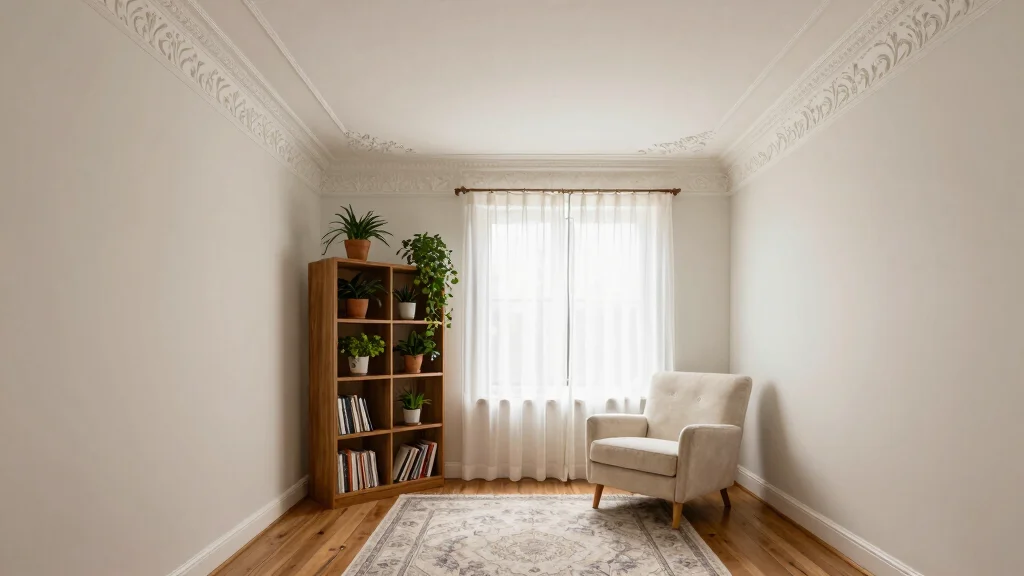
Classic white crown molding is a design staple that never goes out of style. This crisp and clean element enhances spaces with its ability to blend seamlessly with any wall color, adding brightness and elegance. Whether in a traditional or modern setting, it creates a sophisticated transition between wall and ceiling while cleverly concealing those pesky drywall seams. Think of pairing it with soft pastels or bold colors for a delightful contrast that lifts the entire room’s aesthetic.
To implement this look, be sure to measure carefully to avoid gaps, and use caulk to achieve a flawless finish. You can also opt for budget-friendly options like pre-primed moldings available at local hardware stores. This classic choice not only elevates your space but also enhances its value, making it a wise investment for your home.
Consider these tips to optimize your crown molding:
– Pair with light-colored walls for a bright contrast.
– Install in entryways to create an inviting first impression.
– Use a high-gloss finish for a touch of sophistication.
This timeless addition brings a polished look to your interiors, while various textures and materials can elevate the overall design.
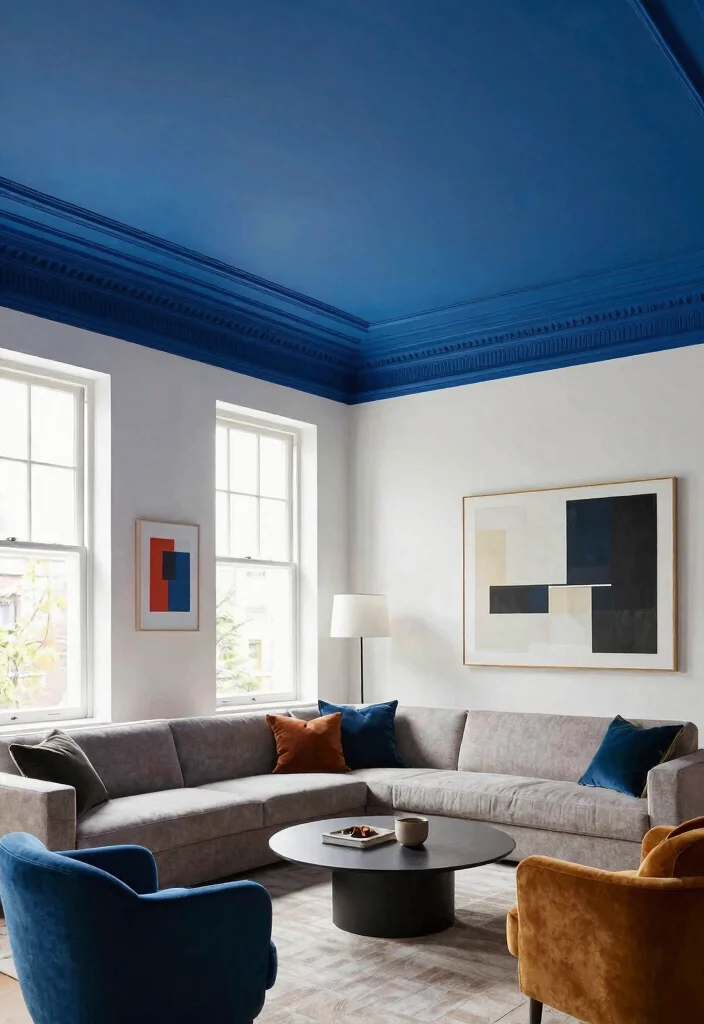
2. Contrasting Dark Molding
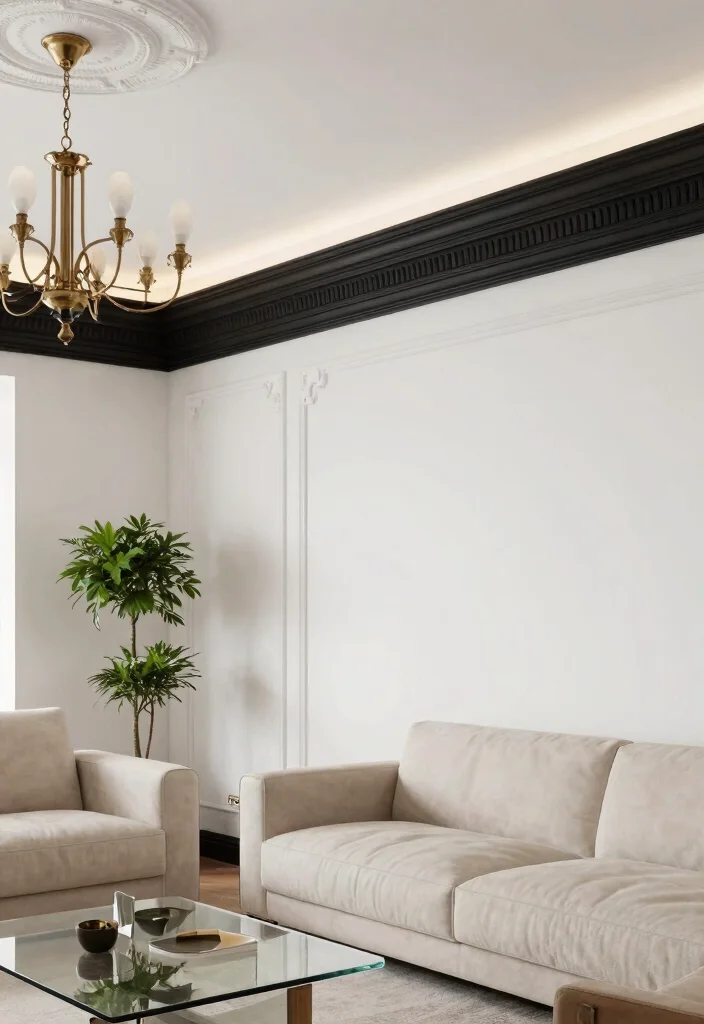
If you want to make a striking impact, opting for contrasting dark molding is an excellent choice. Imagine deep shades like charcoal or navy framing lighter walls; this combination transforms ordinary ceilings into stunning focal points. Perfect for cozy spaces, dark molding adds depth and creates an intimate atmosphere while visually elevating the ceiling height.
When incorporating this style, choose a semi-gloss or satin paint finish to capture light beautifully. You can also enhance its appeal by positioning warm lighting to highlight the richness of the dark color. Balance the boldness with lighter furniture and decor to create an inviting space.
Here are some key ideas for contrasting dark molding:
– Pair dark molding with white or light-colored walls.
– Install in rooms where you want to create a cozy vibe.
– Use complementary accessories to tie the room together.
This trend not only captivates but also adds a unique touch to your home decor that guests will admire.
3. Beadboard Crown Molding
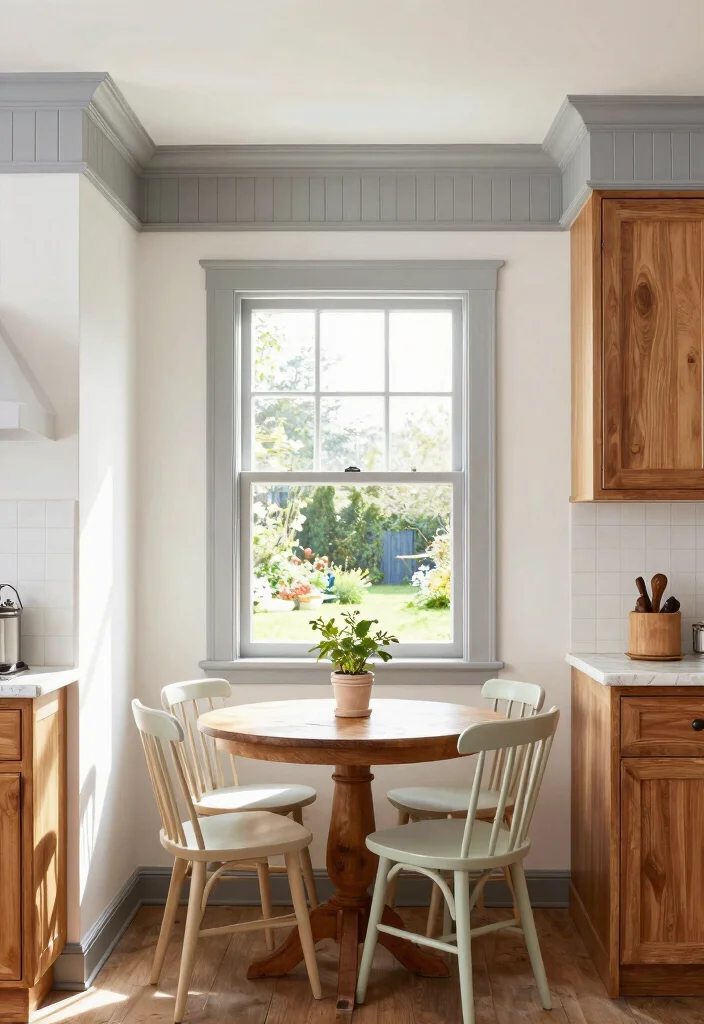
Beadboard crown molding introduces a charming rustic flair to any area. With its distinctive vertical grooves, this molding adds texture and warmth, making it ideal for farmhouse or cottage-style interiors. It cleverly disguises drywall seams while bringing character and coziness to smaller rooms.
For a smooth installation, utilize a miter saw for accurate cuts, and consider painting the molding beforehand for ease of handling. Adding adhesive alongside nails can provide extra stability during installation.
Enhance this rustic look with these tips:
– Use a soft color palette to maintain a light, airy feel.
– Install in areas where a cozy atmosphere is desired.
– Combine with natural materials for a cohesive design.
This approach not only serves a practical purpose but also infuses your space with charm and personality.
Beadboard crown molding’s vertical grooves can visually reduce drywall seams by up to 70% in small spaces, adding instant rustic charm. Pro tips: paint before installation for easier handling, then set with adhesive plus nails for a secure finish.
Difficulty Rating & Requirements
Overall Difficulty Rating: Medium
Installing ceiling crown molding can be rated as medium in difficulty. While it’s approachable for DIY enthusiasts, it does require some level of precision and attention to detail. This project is suitable for those who have basic skills in home improvement and are comfortable using tools. If you are new to home projects, you might find some techniques challenging but rewarding as you progress.
Time Estimate:
⏱ Estimated time: 3-5 hours
– Preparation (1-2 hours): This includes measuring the space, selecting your molding, and gathering tools and materials.
– Installation (1-2 hours): The actual process of cutting, fitting, and attaching the crown molding.
– Finishing Touches (1 hour): This phase includes caulking and painting, if desired.
Skill Requirements:
– Required skills: Measuring, cutting, and nailing. You also need to be able to use a miter saw or a hand saw effectively.
– Beginner-friendly: Yes. If you follow instructions and are willing to learn, you can successfully install crown molding yourself.
– Skills that can be learned include measuring angles accurately and using tools safely. Some tasks, like precise cuts, may require practice but are essential for a good finish.
Tools & Materials Needed:
🧰 Essential items checklist:
– Miter saw (required)
– Crown molding (required)
– Nail gun or hammer (required)
– Measuring tape (required)
– Level (required)
– Caulk and caulk gun (optional but recommended for a clean finish)
– Paint (optional, depending on your design choice)
– Safety goggles (recommended for protection)
Step-by-Step Overview:
1. Preparation (1-2 hours): Measure the wall lengths accurately where the molding will be installed. Decide on the molding style and gather all materials and tools. This step sets the stage for a smooth process.
2. Cutting the Molding (1 hour): Using a miter saw, cut the crown molding at 45-degree angles for corners. Ensure each piece fits perfectly into the next. This stage requires precision to avoid gaps.
3. Attaching the Molding (1-2 hours): Position the molding against the wall and ceiling, using a level to ensure it’s straight. Secure it with a nail gun or hammer. This part can be tricky, so take your time to align everything correctly.
4. Finishing Touches (1 hour): Fill any nail holes with caulk or wood filler. Once dried, you can paint or stain the molding to fit your décor theme. This step adds the final polish to your project.
Cost Comparison: Professional vs DIY:
Hiring a professional to install crown molding can cost anywhere from $700 to $1,500 depending on the size of your space and the complexity of the design. Doing it yourself can save you a significant amount, with costs primarily for materials and tools averaging around $100 to $300. If you’re on a budget and enjoy DIY projects, this can be a great way to upgrade your home without breaking the bank. However, if you’re not confident in your skills, hiring a pro may save you time and ensure a perfect finish.
4. Geometric Crown Molding
For a contemporary twist, geometric crown molding is a fantastic option. Its sharp angles and clean lines bring a modern edge to your ceilings, serving as a striking focal point without overwhelming smaller spaces. This design effectively camouflages imperfections while accentuating your home’s architecture.
Choose a geometric style that complements your overall decor for a unified look. Paint it in a contrasting color to make it stand out against your walls, and don’t shy away from experimenting with varied shapes to find the perfect fit.
To make the most of geometric molding, consider these actions:
– Incorporate different angles for visual interest.
– Select a bold color to make a statement.
– Use in conjunction with minimalist furniture for balance.
This creative approach enhances the personality of your space, allowing for unique expression and style.
Fun fact: geometric ceiling crown molding can visually heighten ceilings in small spaces by guiding the eye along sharp angles and clean lines. Choose a contrasting paint to make the pattern pop without overpowering the room.
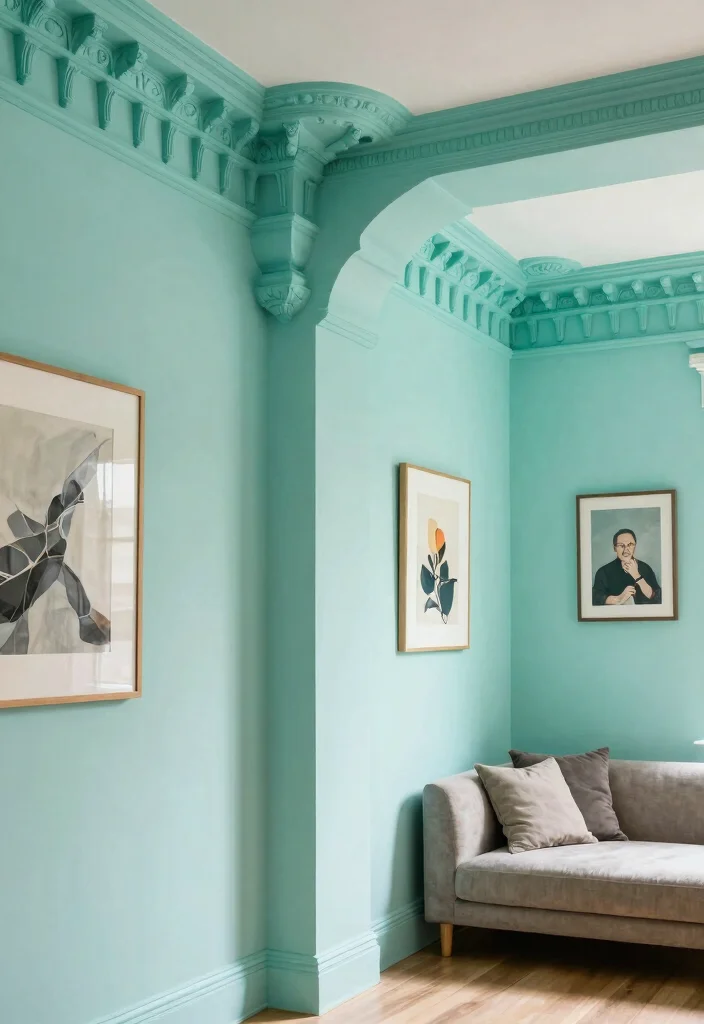
5. Vintage-Inspired Crown Molding
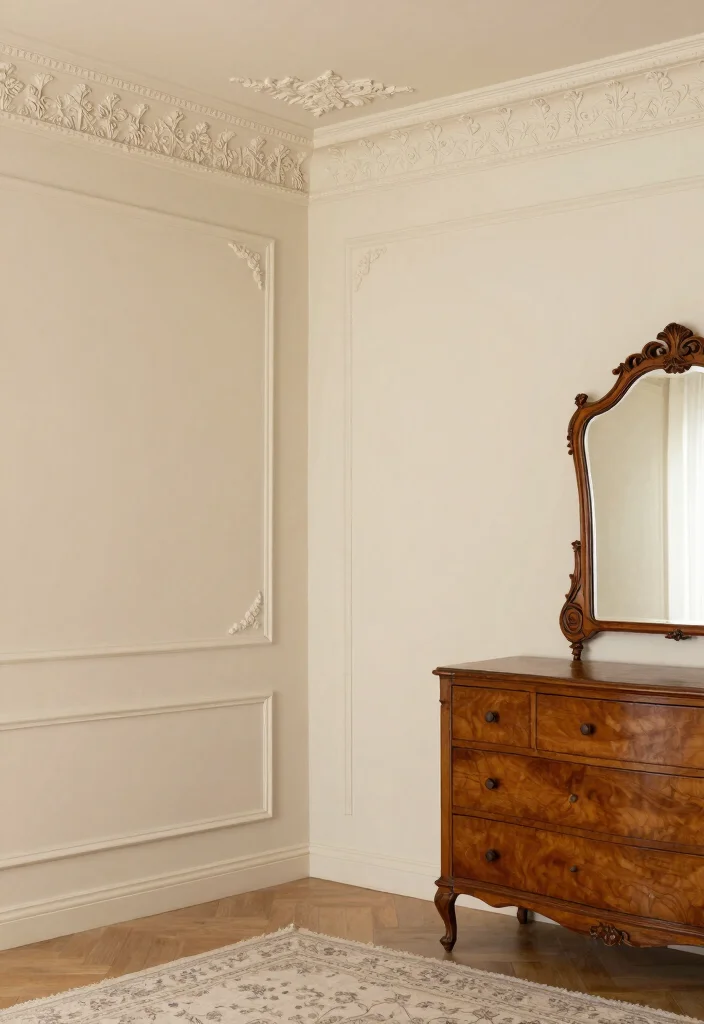
Vintage-inspired crown molding brings a nostalgic elegance to any room. Often adorned with intricate designs, this style resonates with those who love classic beauty. It effectively hides drywall seams while infusing your space with a rich sense of history and character, making it perfect for traditional or eclectic homes.
To incorporate vintage molding, consider pairing it with antique furniture and soft, complementary colors. Gold or silver leaf accents can enhance its charm, while strategic lighting highlights its details beautifully.
Explore these ideas for integrating vintage molding:
– Combine with period-appropriate decor for a cohesive style.
– Use soft lighting to emphasize the intricate designs.
– Incorporate luxurious fabrics to enhance the overall aesthetic.
This charming style invites warmth and storytelling into your living space, creating an inviting atmosphere.
6. Painted Molding Styles
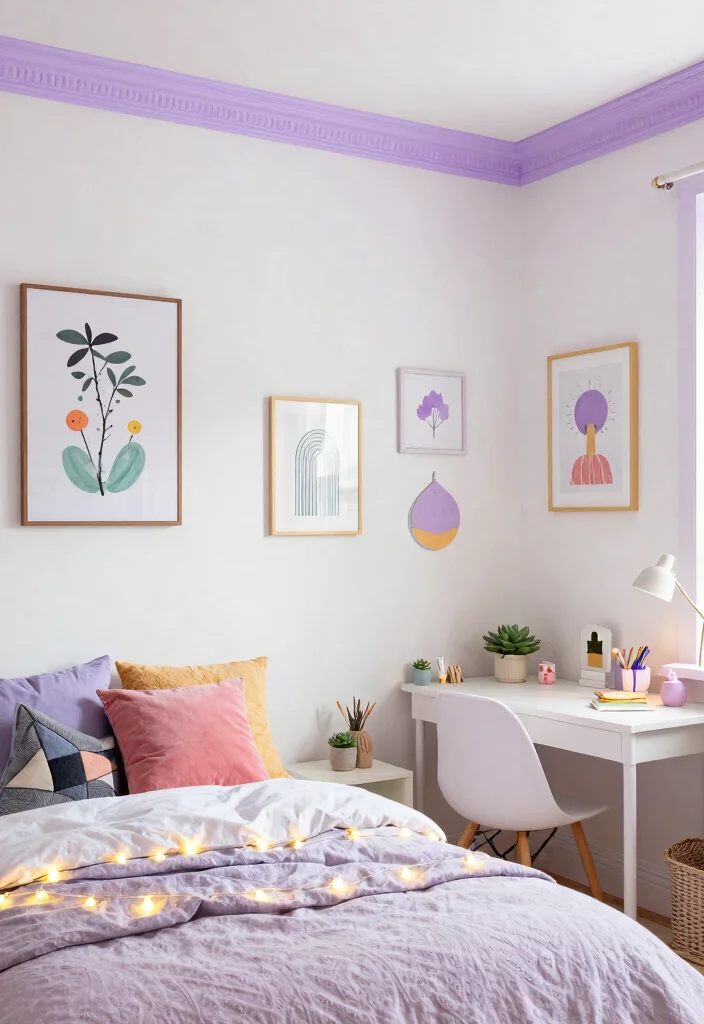
Why settle for conventional finishes when painted molding styles offer endless creativity? Bright hues can surprise and energize a room, while soft pastels provide a serene touch. Painting your molding allows it to adapt to various decor styles while effectively concealing drywall seams.
For the best results, opt for high-quality paint for durability and apply a primer beforehand. You might also enjoy experimenting with color blocking for a modern aesthetic.
Here are practical tips for painted molding:
– Choose colors that complement your overall design scheme.
– Use bold shades to create a statement piece.
– Consider stenciling for added detail and interest.
This approach not only showcases your taste but also personalizes your space, making it a reflection of you.
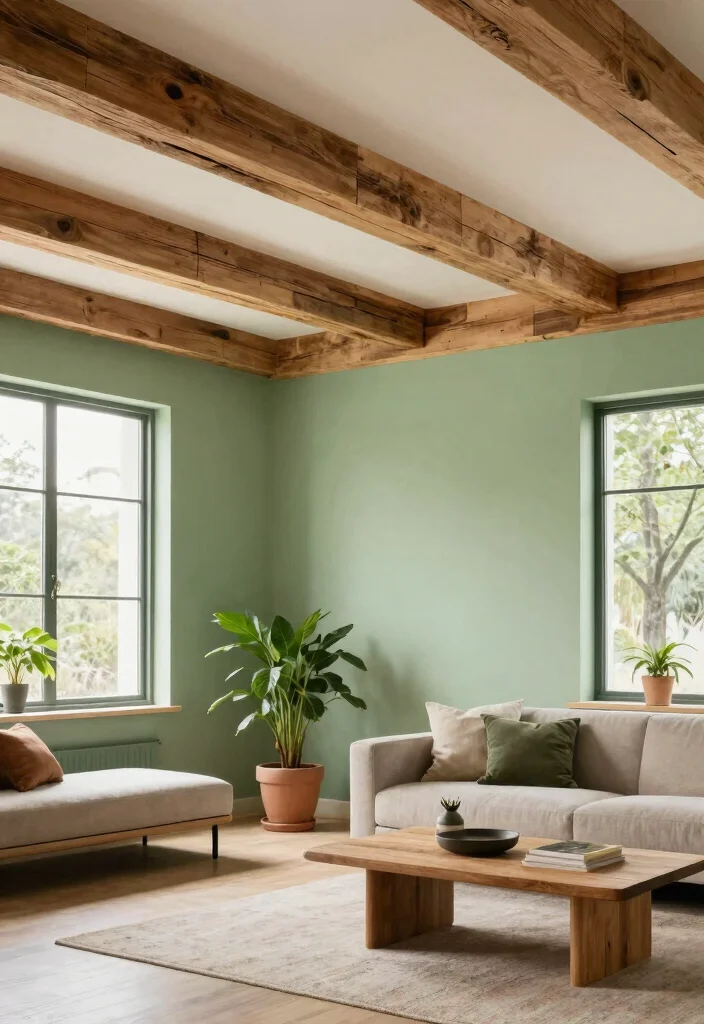
7. Farmhouse-Style Crown Molding
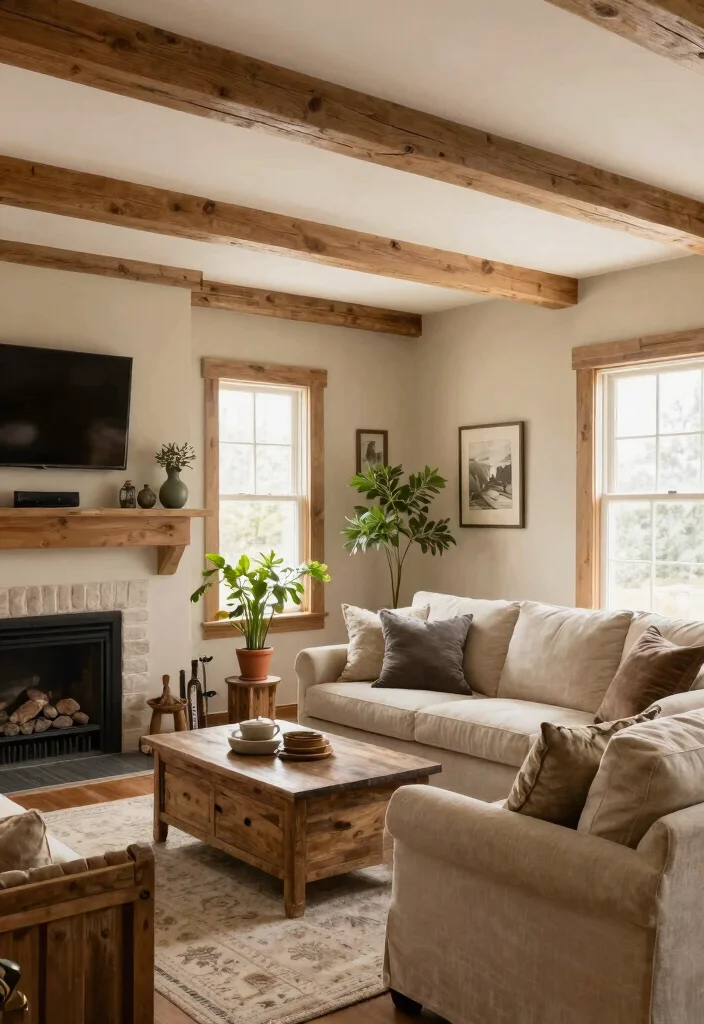
Embracing simplicity and warmth, farmhouse-style crown molding is perfect for achieving a cozy rustic feel. This style features wider, flatter profiles that echo natural wood textures, enhancing your space with a welcoming vibe. It’s especially effective in smaller areas, where it creates an inviting atmosphere while hiding drywall imperfections.
To optimize farmhouse molding, stain or paint it in neutral shades to emphasize its rustic charm. Pair it with open shelving and warm lighting for a harmonious look, and integrate natural materials throughout for a cohesive design.
Consider these tips for farmhouse-style molding:
– Use natural wood tones for authenticity.
– Combine with vintage accessories for added character.
– Incorporate plants for a touch of nature.
This trend captures the essence of comfort, making your space a true sanctuary.
Farmhouse-Style ceiling crown molding brings warmth to small spaces without crowding them. Keep it neutral, stain or paint in soft tones, and pair with open shelving and warm lighting—suddenly rough drywall seams fade into cozy charm.
8. Minimalist Crown Molding

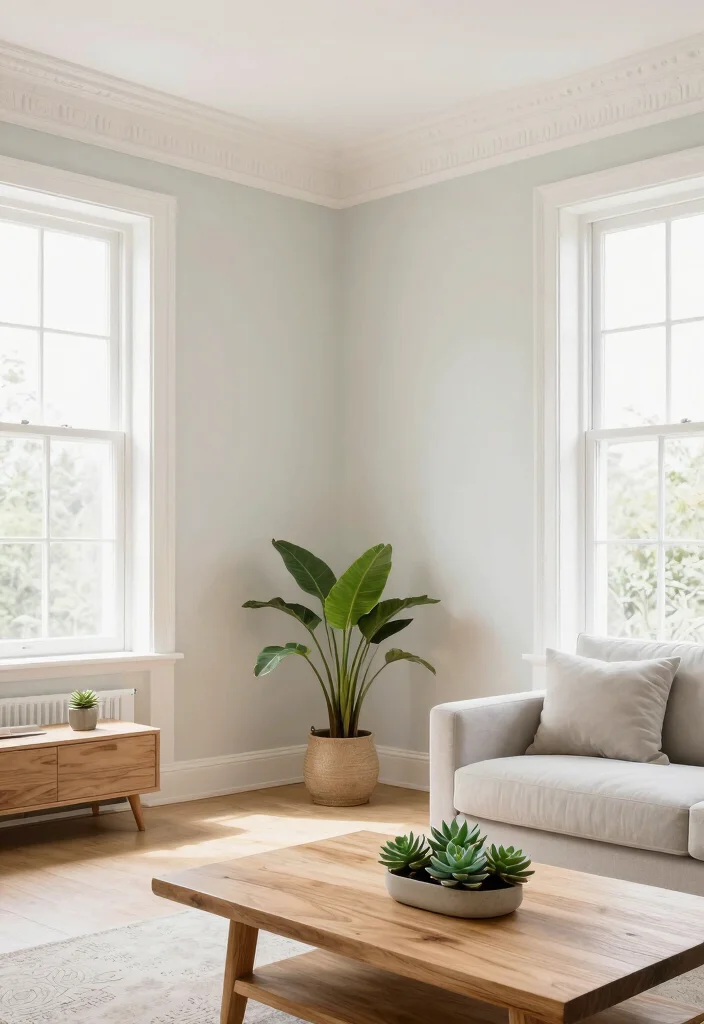
Embracing the philosophy of ‘less is more,’ minimalist crown molding perfectly suits modern spaces. Its simple, unembellished design focuses on clean lines and functionality while enhancing the perception of height in smaller areas. This style effectively hides drywall flaws while maintaining a light, airy vibe.
When installing minimalist molding, choose a thin profile for subtlety and consider unpainted or lightly stained finishes for a natural touch. To keep the focus on the molding, balance the space with minimalist furniture and decor.
Here are some tips for achieving a minimalist look:
– Select neutral colors for a calm atmosphere.
– Use sleek lines to emphasize simplicity.
– Integrate large windows to maximize natural light.
This approach aligns seamlessly with contemporary design ideals, promoting an uncluttered and serene environment.
9. Layered Crown Molding
Layered crown molding introduces depth and texture to your ceiling, creating captivating visual interest. By stacking multiple strips of molding, you can make a bold statement in any room while cleverly hiding drywall seams and accentuating architectural elements.
To achieve this look, experiment with different profiles to find a unique design. Painting the layers in contrasting colors can highlight the depth, while ensuring proper alignment is key to avoiding gaps.
Consider these installation suggestions:
– Mix various styles for a personalized touch.
– Use a combination of colors to enhance layers.
– Keep the spacing even for a polished finish.
This design trend is not just practical; it also offers an exciting opportunity to showcase your creativity and style.
10. Eco-Friendly Crown Molding
Eco-friendly crown molding options are ideal for environmentally conscious homeowners who value both style and sustainability. Crafted from sustainable materials, these moldings effectively conceal drywall seams while promoting a green living ethos. They come in various designs and can be customized with paint or stain for a personal touch.
When selecting eco-friendly molding, look for products made from reclaimed or recycled materials. Ensure your paints or finishes are low in volatile organic compounds (VOCs) for a healthier atmosphere. Pairing eco-friendly crown molding with energy-efficient lighting enhances the overall vibe of your space.
Keep these considerations in mind:
– Choose brands that prioritize sustainability.
– Select colors that harmonize with your decor.
– Incorporate natural elements throughout the room.
This choice beautifully combines aesthetics and responsibility, enriching your home while caring for the environment.
11. Customizable Crown Molding
With customizable crown molding, you can create a unique aesthetic that perfectly reflects your style. Offering diverse shapes and patterns, this option is adaptable to any design, making it ideal for smaller areas. Custom molding not only hides unsightly seams but also serves as a focal point that showcases your personal taste.
To embark on this journey of customization, collaborate with a carpenter or explore DIY kits that allow you to bring your vision to life. Consider your overall decor to ensure cohesion, and don’t hesitate to experiment with colors and shapes to find your signature look.
Here are some ideas for customizing your crown molding:
– Incorporate your favorite design elements for personal flair.
– Use contrasting colors to make a statement.
– Explore various textures for added depth.
This flexibility empowers you to showcase your individuality, creating a space that truly feels like home.
12. Faux Wood Crown Molding
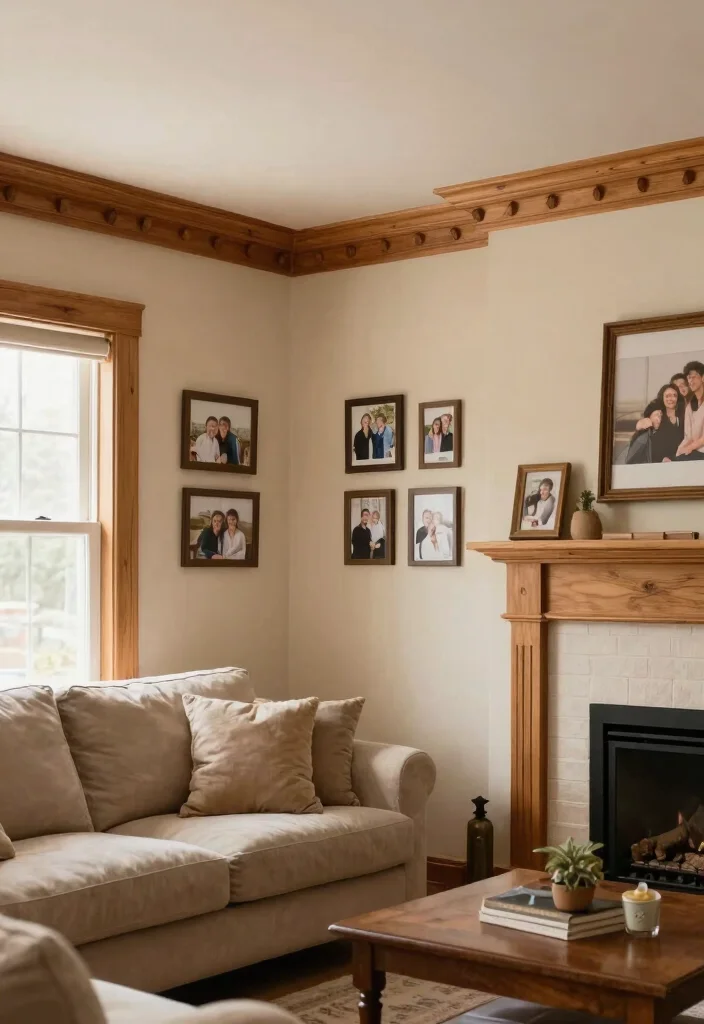
Faux wood crown molding delivers the rich aesthetic of wood without the hefty price tag or weight. This versatile material can be painted or stained to blend seamlessly with your decor, offering a warm ambiance while effectively covering drywall seams. Lightweight and easy to install, faux wood is perfect for smaller spaces where style and functionality are essential.
When choosing faux wood molding, seek high-quality options that closely mimic real wood grain. Pair it with warm lighting to accentuate its texture, and opt for a satin finish for a realistic appearance.
Keep these considerations in mind:
– Select styles that complement your overall design.
– Use versatile colors that match your decor.
– Consider mixing with other materials for visual interest.
This choice allows you to enjoy the beauty of wood with minimal maintenance, enhancing your home’s charm.
Conclusion
Ceiling crown molding can truly transform your space, making it feel polished and inviting while cleverly hiding drywall imperfections.
With these 12 ideas, there’s a perfect style for every home and personal aesthetic. Consider incorporating some of these trends in your next DIY project, and share your latest crown molding endeavors to inspire others on their home improvement journey!
Frequently Asked Questions
What ceiling crown molding ideas work best to hide rough drywall seams in a small space?
Choosing the right ceiling crown molding can instantly hide rough drywall seams in a small space. Start with a slim profile or a simple stepped design that draws the eye upward and makes the ceiling feel taller.
Pair the molding with a light, cohesive paint or skim coat on any rough patches, and finish with clean caulk lines along the joints. For DIY success, dry-fit the piece first, then secure with finishing nails or adhesive, fill nail holes, sand smooth, and paint once dry. This approach minimizes texture differences and elevates home décor and interior design without a heavy drywall repair job.
How do I install ceiling crown molding in a small space without making it feel cramped?
Start by choosing a slim profile and lightweight materials like foam or polyurethane. Measure walls carefully and snap a level line along the ceiling. Cut miters at 45 degrees, or cope the joints for a snug fit in corners, then dry-fit before attaching. Use a combination of construction adhesive and finishing nails so you don’t rely on a lot of nails. Fill gaps with flexible caulk, touch up with paint, and enjoy a clean, elevated look. This approach is perfect for practical molding installation and adds subtle decorative trim to any small room.
Can ceiling crown molding hide rough drywall seams without major drywall repair?
Yes—if the seams are rough but the wall is sound, crown molding can conceal them, sometimes with only a light patch behind the trim. Prep the wall with a thin skim coat to smooth ridges, sand flush, then install the molding. After installation, caulk along the edges and paint to blend the seams into the wall. This is a practical approach to drywall repair that preserves momentum in your project while delivering a polished ceiling crown molding look.
What crown molding styles help make small rooms look taller and more stylish?
Choose tall, slim profiles or inverted crown to create strong vertical lines that draw the eye upward. Opt for long, uninterrupted runs and minimal ornamentation to avoid visual clutter in tight spaces. White or light neutrals brighten the room and enhance interior design goals, while sparing use of ornate details keeps things modern. Add a touch of decorative trim sparingly to keep the space feeling open and thoughtfully curated.
What are budget-friendly ceiling crown molding options that still deliver a high-end look?
Consider budget-friendly materials like foam or polyurethane crown molding, PVC, or MDF that are easy to cut and install. They’re lightweight, warp-resistant, and take paint beautifully. Use adhesive with a few finishing nails, then fill and caulk gaps for a seamless transition. With a clean paint job and smart lighting, these affordable options deliver a high-end feel for home décor and molding installation in small spaces without breaking the bank.
Related Topics
ceiling crown molding
drywall repair
home décor
interior design
molding installation
decorative trim
small spaces
DIY projects
beginner friendly
easy updates
budget friendly
stylish finishes