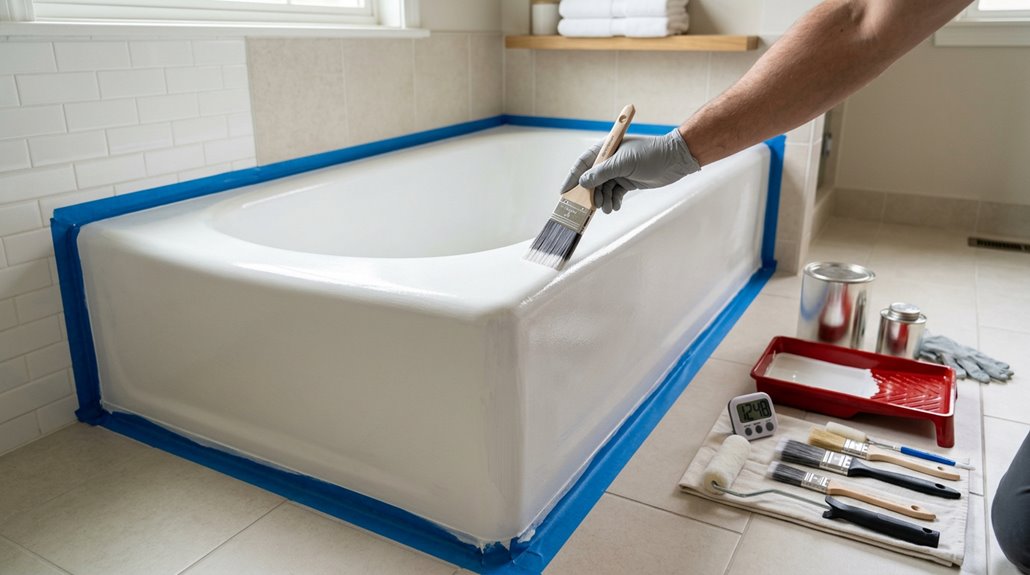
I’m gonna walk you through transforming your dingy bathtub into something that looks professionally done. First, you’ll gather your supplies: epoxy paint, sandpaper, and protective gear. Then tackle the grime with serious scrubbing. Sand everything smooth, mask off edges carefully, and apply that epoxy in thin coats, which have a narrow application window. The tricky part is waiting three full days before you shower, but that patience ensures the coating cures properly. Stick with me and I’ll show you exactly how each step actually works.
Gather Supplies for Epoxy Bathtub Painting
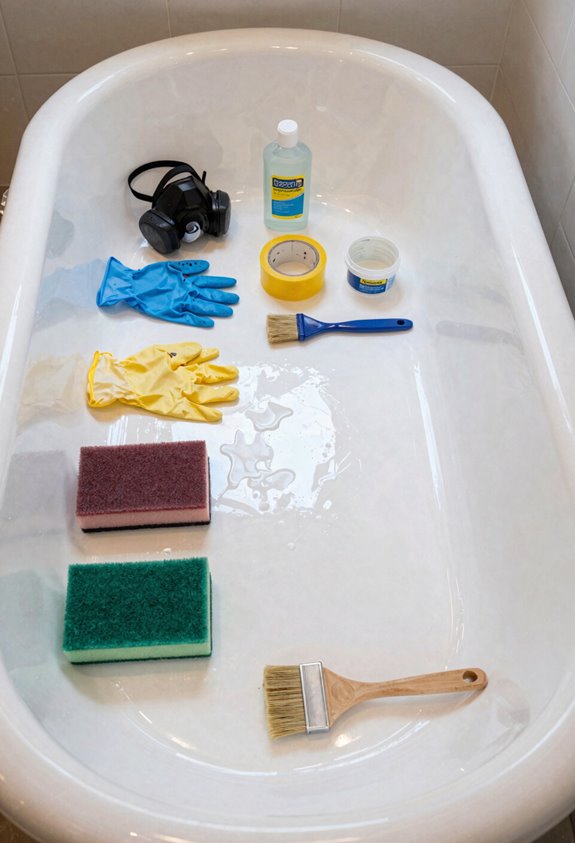
Ready to transform that dingy bathtub into something that actually looks clean. Before you even crack open that epoxy paint, you need to gather your supplies. Showing up unprepared will compromise your results.
First, grab a caulk removal tool, some 400–600 grit sandpaper, and a solid tub cleaner. You’ll also want painter’s tape to mask off areas you don’t want painted, a mask for yourself, and proper ventilation with windows or an exhaust fan running. Don’t forget a tack cloth for wiping away dust.
Having everything ready means you won’t scramble mid-project. You’ll stay organized and focused throughout the work.
Remove Old Caulk and Patch Surface Damage
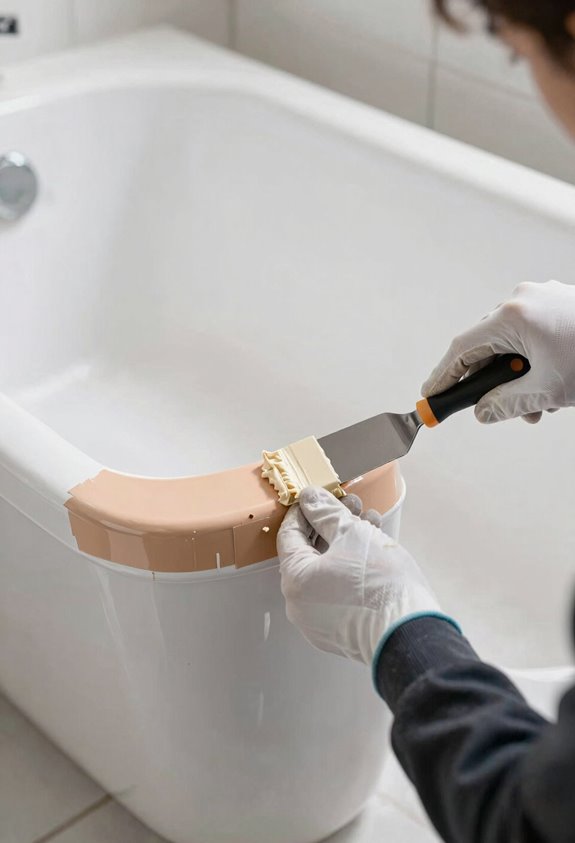
Before you can paint that tub, removing the old caulk is absolutely necessary. Grab a utility knife or caulk removal tool and scrape away everything around those edges until you have clean lines ready for the new seal. While you’re at it, hunt down any chips or cracks in the fiberglass, as they often hide under the grime. Patch those areas so you don’t end up with a bumpy, uneven surface under your fresh epoxy coat. Getting these two things done correctly prevents a sloppy-looking finish.
Caulk Removal Techniques
Once you’ve got your bathtub prepped and ready for its makeover, you’ll need to tackle the old caulk first. This part is tedious but absolutely essential. Grab a utility knife or caulk removal tool and carefully scrape away that crusty caulk around tub edges. You’re basically just running your tool along the seam, peeling up layers of old, hardened material. It’s satisfying once you get going.
Remove all old caulk completely. Any leftover bits will interfere with your new epoxy coating later, creating visible seams and adhesion problems. After you’ve scraped everything clean, apply painter’s tape around the surrounding areas. This protects your walls, floor, and fixtures from accidental paint splashes. This simple step prevents costly cleanup later.
Repair Chips And Cracks
Now that you’ve got all that old caulk scraped away, it’s time to address the damage hiding underneath: those chips and cracks that need attention before painting.
To fix these problem spots:
- Apply epoxy putty directly into chips and cracks, pressing firmly so it fills completely
- Smooth the patched area with a putty knife, making it level with the surrounding surface
- Let the epoxy cure fully according to product instructions (usually a few hours)
- Sand the repaired spots smooth using medium-grit sandpaper for seamless blending
- Wipe away all dust with a damp cloth before moving forward
This tub repair step is crucial. Skipping it means your paint job will look rough and uneven. Completing this work properly ensures a professional finish.
Clean Thoroughly to Remove Buildup and Mildew
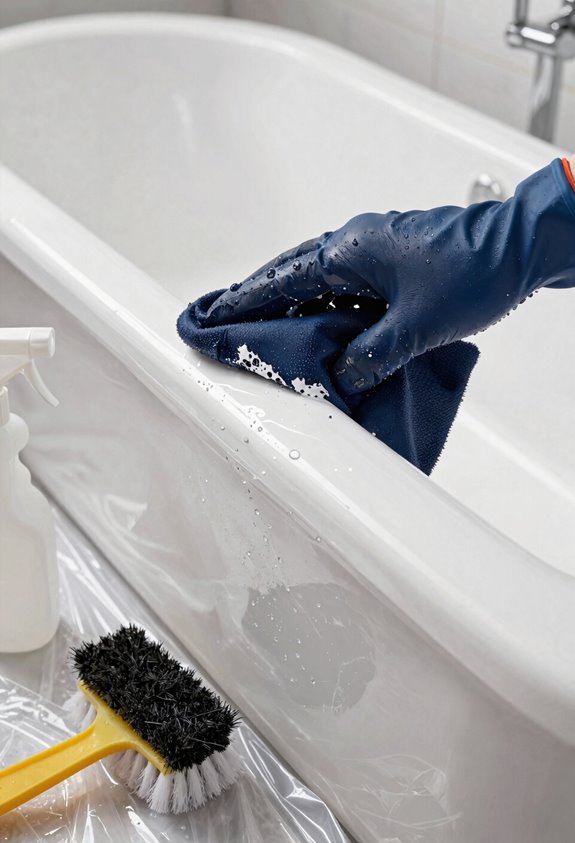
If you don’t scrub that tub down properly, your epoxy paint will flake right off. You’ll need to tackle the mildew and soap scum buildup, which is all the grimy stuff that accumulates over time. Grab either a regular bathroom cleaner or mineral spirits mixed with TSP, a degreaser that cuts through stubborn residue effectively. Get in there and really scrub it down. A clean surface is the foundation of making this project work.
Removing Mildew and Scum
Why do bathtubs seem to collect every gross thing known to humanity? Mildew and scum accumulate readily, and failing to remove them will compromise your epoxy bonding.
Here’s my mildew removal game plan:
- Spray bathroom cleaner generously and let it sit for several minutes
- Scrub vigorously with a brush to break up stubborn buildup
- Use mineral spirits or TSP substitute for extra-tough grime
- Rinse thoroughly until water runs completely clear
- Wipe everything down with a tack cloth to catch remaining dust
Thorough cleaning requires effort, but skipping this step means your paint job fails. Proper preparation here is essential for achieving a professional finish.
Choosing Appropriate Cleaning Products
The right cleaning products make all the difference between a paint job that sticks around and one that peels off faster than you can say “bathroom disaster.” You’ve got a few solid options here, depending on what kind of gunk you’re dealing with. Regular bathroom cleaner works great for everyday dirt and soap scum, but when you’re facing serious mildew (that black, fuzzy stuff that makes your skin crawl), you’ll want to bring in the heavy hitter: a bleach-and-water solution that actually kills the mold spores instead of just hiding them. Mineral spirits or TSP substitute also work well for stubborn buildup. This thorough cleaning step determines whether your bonding surface accepts paint properly or rejects it entirely. Don’t skimp here; it’s the foundation for mildew removal and lasting results.
Sand Your Bathtub to Help Epoxy Bond
Before you apply epoxy, you must rough up your bathtub’s surface with sandpaper.
Smooth fiberglass won’t hold epoxy effectively. You need to create tiny tooth marks (roughness) so the coating actually sticks. Choose between 220-grit or 400-grit sandpaper depending on what you’re working with:
- Use 220-grit for chipped, worn, or damaged spots that need serious roughening
- Switch to 400-grit on smoother areas for a finer profile
- Sand the entire fiberglass bathtub surface methodically
- Wipe everything down with a tack cloth afterward to remove all dust
- Skip this step and your epoxy bonding will fail
This prep work determines whether your paint job lasts or peels off in chunks.
Mask Edges, Drains, and Fixtures Carefully
Masking is one of those steps that separates a clean, professional-looking paint job from a messy disaster where epoxy’s dripped all over your tiles and you’re spending hours scraping it off. Careful masking matters.
| Area | Tool | Purpose |
|---|---|---|
| Tub edges | Painter’s tape | Create crisp boundaries |
| Drain | Tape or removal | Prevent epoxy pooling |
| Showerhead | Protective tape | Shield from drips |
| Surrounding tiles | Tape barrier | Protect adjacent surfaces |
| Spouts | Masking tape | Minimize cleanup |
Start by removing old caulk with a utility knife, then apply painter’s tape carefully around every edge. Tape drains, spouts, and the showerhead. basically anything that isn’t getting painted. Remove tape while the coating’s still tack-free to get sharp, clean lines that look professional.
Mix the Two-Part Epoxy Paint Correctly
Once your masking’s done and your tub’s prepped, it’s time to crack open that epoxy paint and get mixing.
Here’s what works best:
- Mix Part A and Part B thoroughly for at least five minutes
- Wear a mask because the fumes are seriously intense and unpleasant
- Keep windows and fans going for proper ventilation while you work
- Use your mixed epoxy within six hours before it starts setting up
- Expect it to look watery at first; that’s totally normal and a good sign
The initial mixture seems thin, almost disappointing, but that’s exactly what you want. Don’t panic. That working time window is tight, so stay focused and ready to apply.
Apply Epoxy Paint to the Shower Surround
Pour your mixed epoxy into a tray so you don’t waste the mixture. Load your roller lightly and tackle one quadrant at a time, working methodically to smooth out bubbles with back-and-forth rolling motions. Use a foam brush for those tricky corners and edges, dabbing gently to keep brush strokes invisible. After each panel, lightly roll again to blend everything seamlessly and prevent visible lines. This methodical approach ensures professional results.
Paint Your Bathtub With Multiple Epoxy Coats
I’m gonna walk you through the mixing, application, and curing process because nailing these three things is what separates a pro-looking finish from a blotchy mess that’ll frustrate you every time you shower. You’ll mix that two-part epoxy thoroughly, at least five minutes of stirring, then you’ve got a six-hour window to get your coats on before the stuff hardens up on you. Between each coat, I’m talking an hour or two of waiting, testing adhesion in a hidden spot, and keeping a careful eye out for drips while you’re applying. Doing this right means you won’t be redoing it in six months.
Mixing And Prep Work
How ready are you to get your hands a little messy?
This is where the magic happens. I’m about to mix my two-part epoxy, and I need to be careful not to mess this up. Here’s what I’m doing:
- Pouring Part A and Part B into a container, stirring thoroughly for at least five minutes straight
- Cracking open every window in my bathroom (this stuff smells intense)
- Putting on my mask and firing up the exhaust fan before I even crack that epoxy open
- Grabbing my brush and roller, knowing I’ve got about six hours of working time before it gets thick and useless
- Dividing my tub into sections so I don’t panic about drying too fast
This prep work determines whether you get a professional-looking finish or a poor result.
Application Between Coats
Because that first coat’s drying and you’ve got a narrow window to work with, you’ll want to stay sharp and keep moving. This requires both patience and urgency, and the timing is critical. You’ve got about an hour before applying the second coat, so grab a tack cloth (basically a sticky cloth that picks up dust) and gently wipe the entire surface. This prevents debris from embedding itself into your finish. Once you’ve cleaned things up, you’re ready for round two. Apply that second coat within 1–2 hours, maintaining a wet edge to avoid lap marks, those annoying lines where coats overlap. Light rolling between coats blends everything beautifully. Staying focused during this stage ensures a quality result.
Curing And Maintenance
Once you’ve wrapped up that second coat, the real waiting game begins. Here’s what you’re looking at:
- Full epoxy curing takes three days minimum before any water touches your tub
- Don’t peek or test it early. Patience is essential here
- Re-caulk around edges the next day after your final coat fully dries
- Avoid showers for at least three days to protect that fresh surface from damage
- Check hidden spots for adhesion issues before declaring victory
Rushing this part leads to having to redo everything. Your newly coated tub will remain beautiful and durable for years when you follow these curing steps properly.
Cure Your Epoxy Bathtub Paint Before Use
You’ve just painted your bathtub and probably want to take a shower. Patience is essential here. Your epoxy curing process isn’t finished yet, and jumping in too soon will damage everything you’ve worked for.
You need to give it a full cure, roughly three days before water touches your freshly painted surface. Yes, three whole days. It feels like a long time.
| Timeline | What’s Happening |
|---|---|
| Day 1 | Paint hardens |
| Day 2 | Adhesion strengthens |
| Day 3 | True durability forms |
| Day 4 | Safe for light use |
| Day 5+ | Full strength reached |
Wait before use, and your tub will reward you with years of gorgeous, yellowing-resistant shine. The curing timeline ensures a durable finish that resists staining and wear.
Re-Caulk Edges and Wait Three Days Before Using
Why does caulking matter after you’ve already painted? Your refinishing kit isn’t complete until you seal those edges. Water will sneak into the tiniest gaps and ruin everything you’ve worked for.
After removing painter’s tape, follow these steps:
- Ventilate with fans to clear fumes and dust
- Wait until the next day for optimal caulk adhesion
- Apply high-quality caulk like DAP’s QuickSeal Ultra around all edges
- Create a watertight seal between tub and tile
- Plan your curing time carefully; don’t rush this
The three-day waiting period is crucial. Your epoxy needs that full curing time before water touches it. Showering before the cure completes will compromise the seal and damage your work. You’ve invested significant effort, so protect your investment by following through completely.