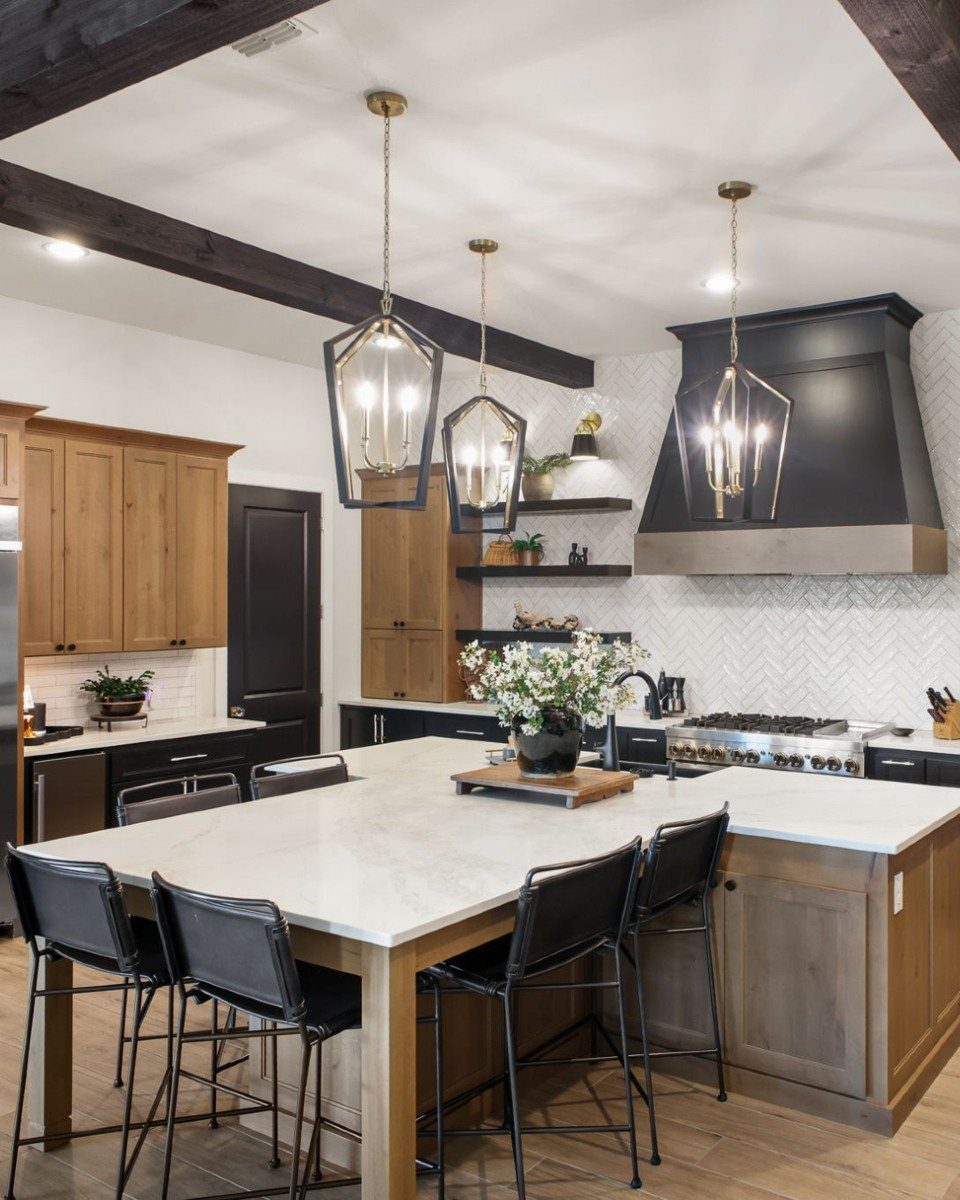
Measure your floor before falling for any of these: stools need 36–44 inches of open space behind them on every seated side, and a room that can’t spare that is a better match for a peninsula tied into the cabinet run.
You’ll find everything from 2 basic rows of stools set face to face to a split-level build that calls for a cabinet maker, plus a dining table fused to the island and a pair of islands with a walkway running between them.
Waterfall stone ends and curved edges raise fabrication cost, so budget follows the shape you pick.
1. Seats on Opposing Sides
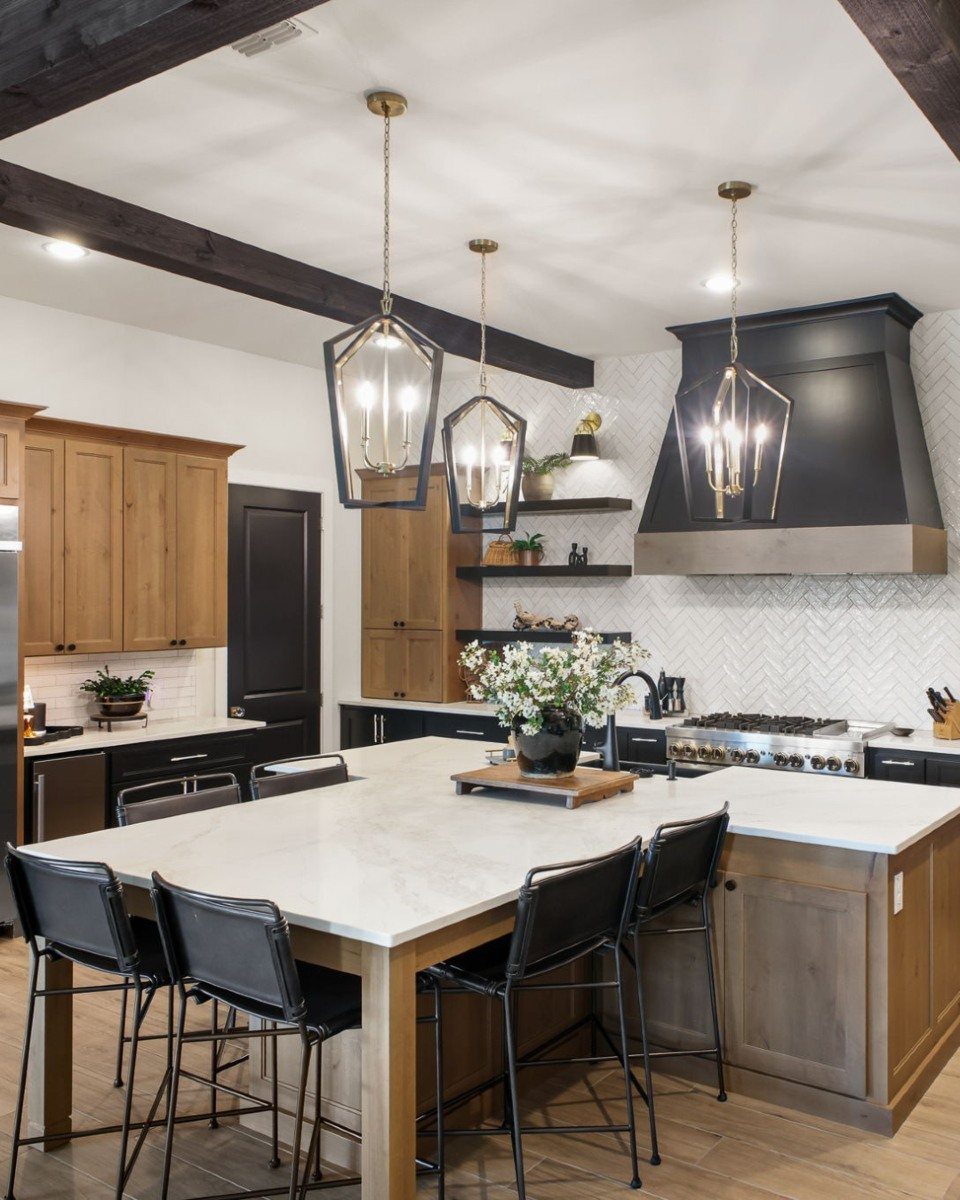
2 rows of stools facing each other turn an island into a small table for conversation, which suits anyone who cooks with company.
Nobody sits with their back to the cook, and kids doing homework across from a parent beat a lineup staring at a wall.
I would pick backed stools for the long haul, since people linger more when the seat supports them.
Keep the island wide enough that both rows have knee room without bumping each other, and hang the pendants centered over the middle so neither side sits in shadow.
2. Split-level Island
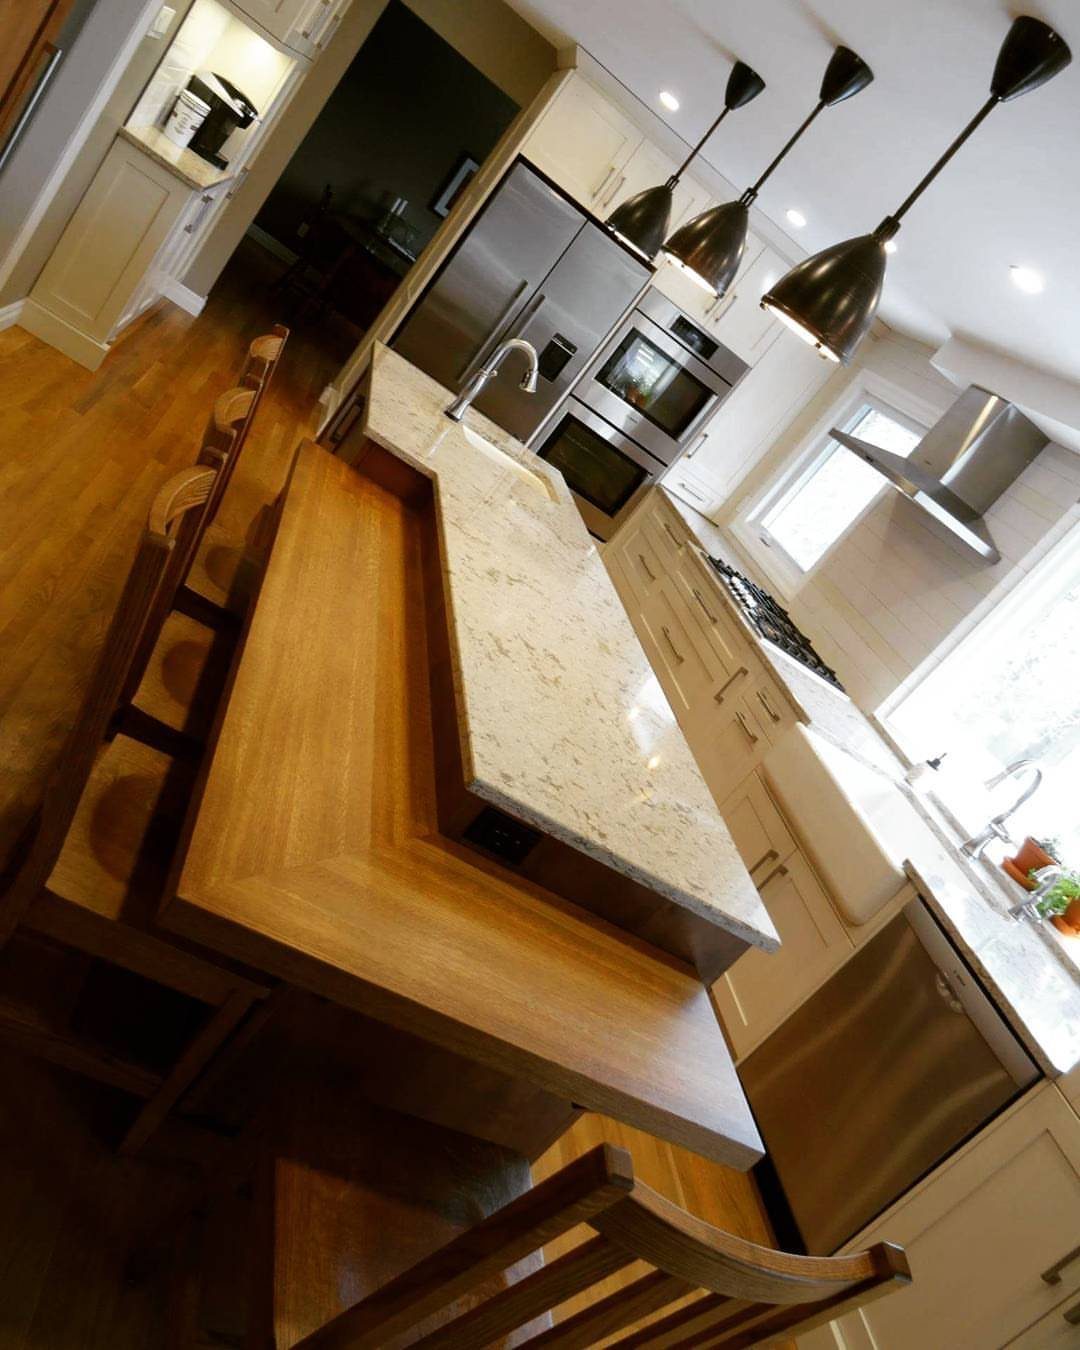
A raised prep side and a lowered eating side let one island do two jobs without fighting over space.
Crumbs, cutting boards and hot pans stay on the high level, while the lower wooden surface stays clear for plates and laptops.
I like that the split hides kitchen mess from the diners.
The cost is a more complex build, so expect a cabinet maker or a careful DIY with plywood framing. Match the 2 surfaces in tone if you want calm, or contrast them as the white stone and wood do here.
3. Island with Table
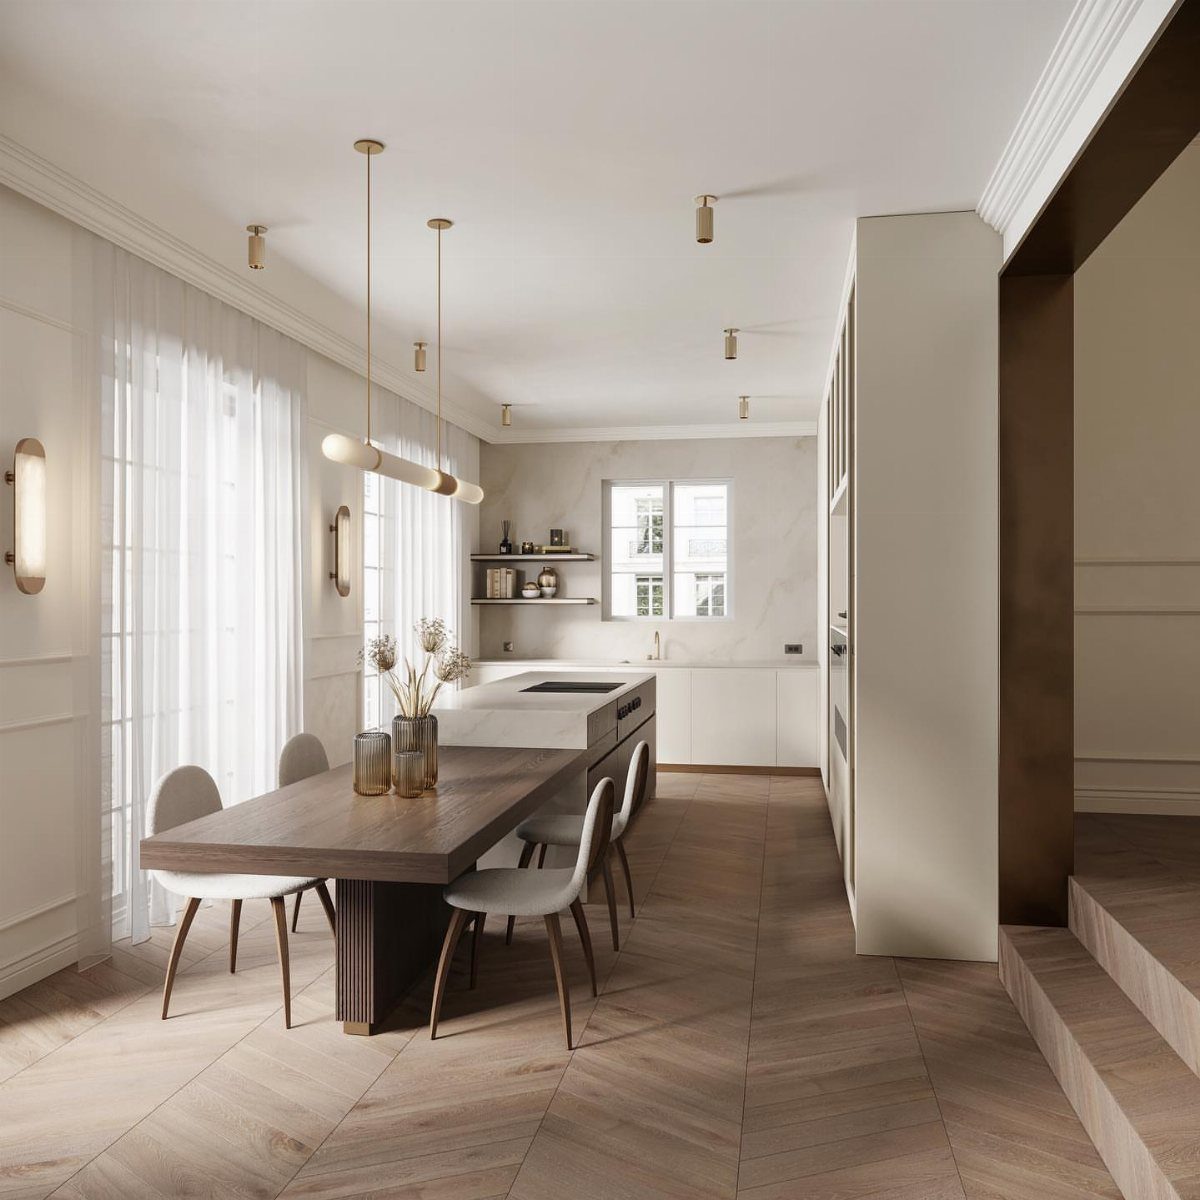
Attach a real dining table to the island and you may not need a separate dining room at all. For a small home or rental-sized open plan, that saves floor space and the cost of a second large furniture piece.
Chairs replace stools, which is easier on older relatives and anyone who hates climbing onto a seat.
Keep the table and island on matching floor-to-top proportions so the join reads as planned, and choose chair fabric you can wipe clean since the table sits right beside the cooking.
4. Kitchen Island Peninsula
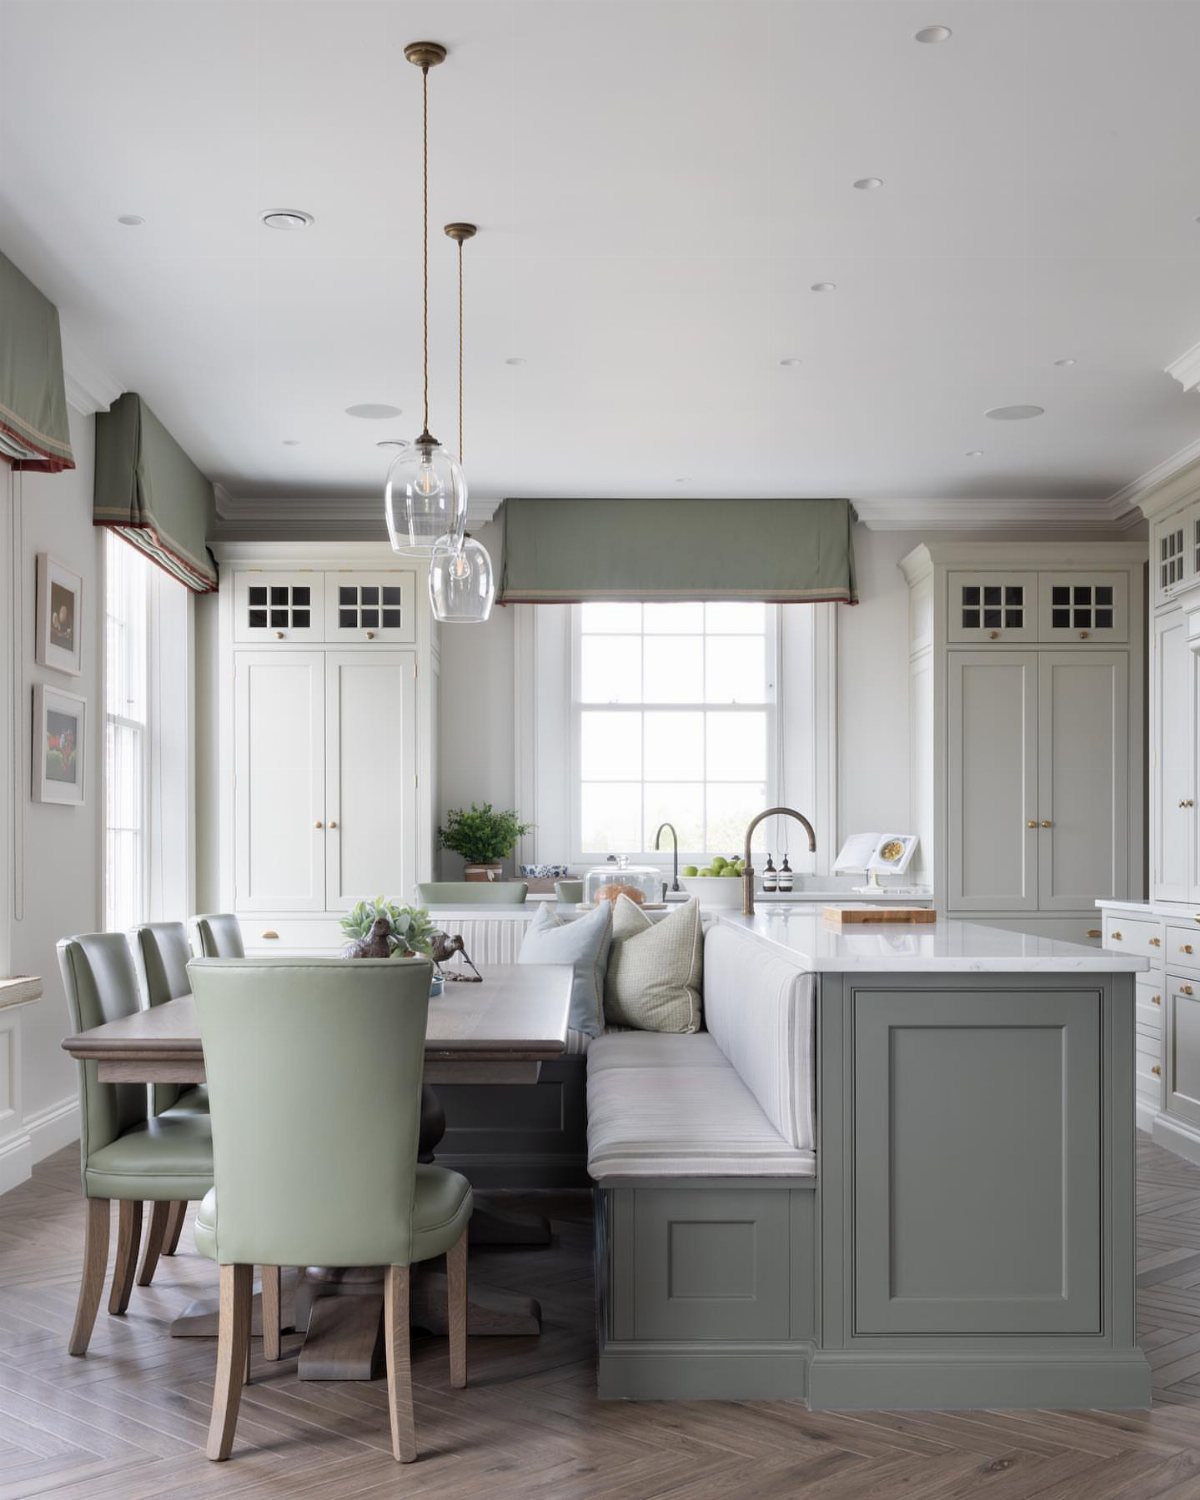
Anchoring one end of the island to the cabinet run turns it into a peninsula, and that frees you from the clearance a floating island demands on every side.
It works well in kitchens that are too narrow for a freestanding piece.
A built-in banquette tucked beside the table adds seating along the wall and stores gear underneath if you build it with lift-up tops.
I would choose wipeable upholstery on both the bench and the chairs. The trade-off: a peninsula blocks one walkway, so check traffic flow before committing.
5. Table-height Island End
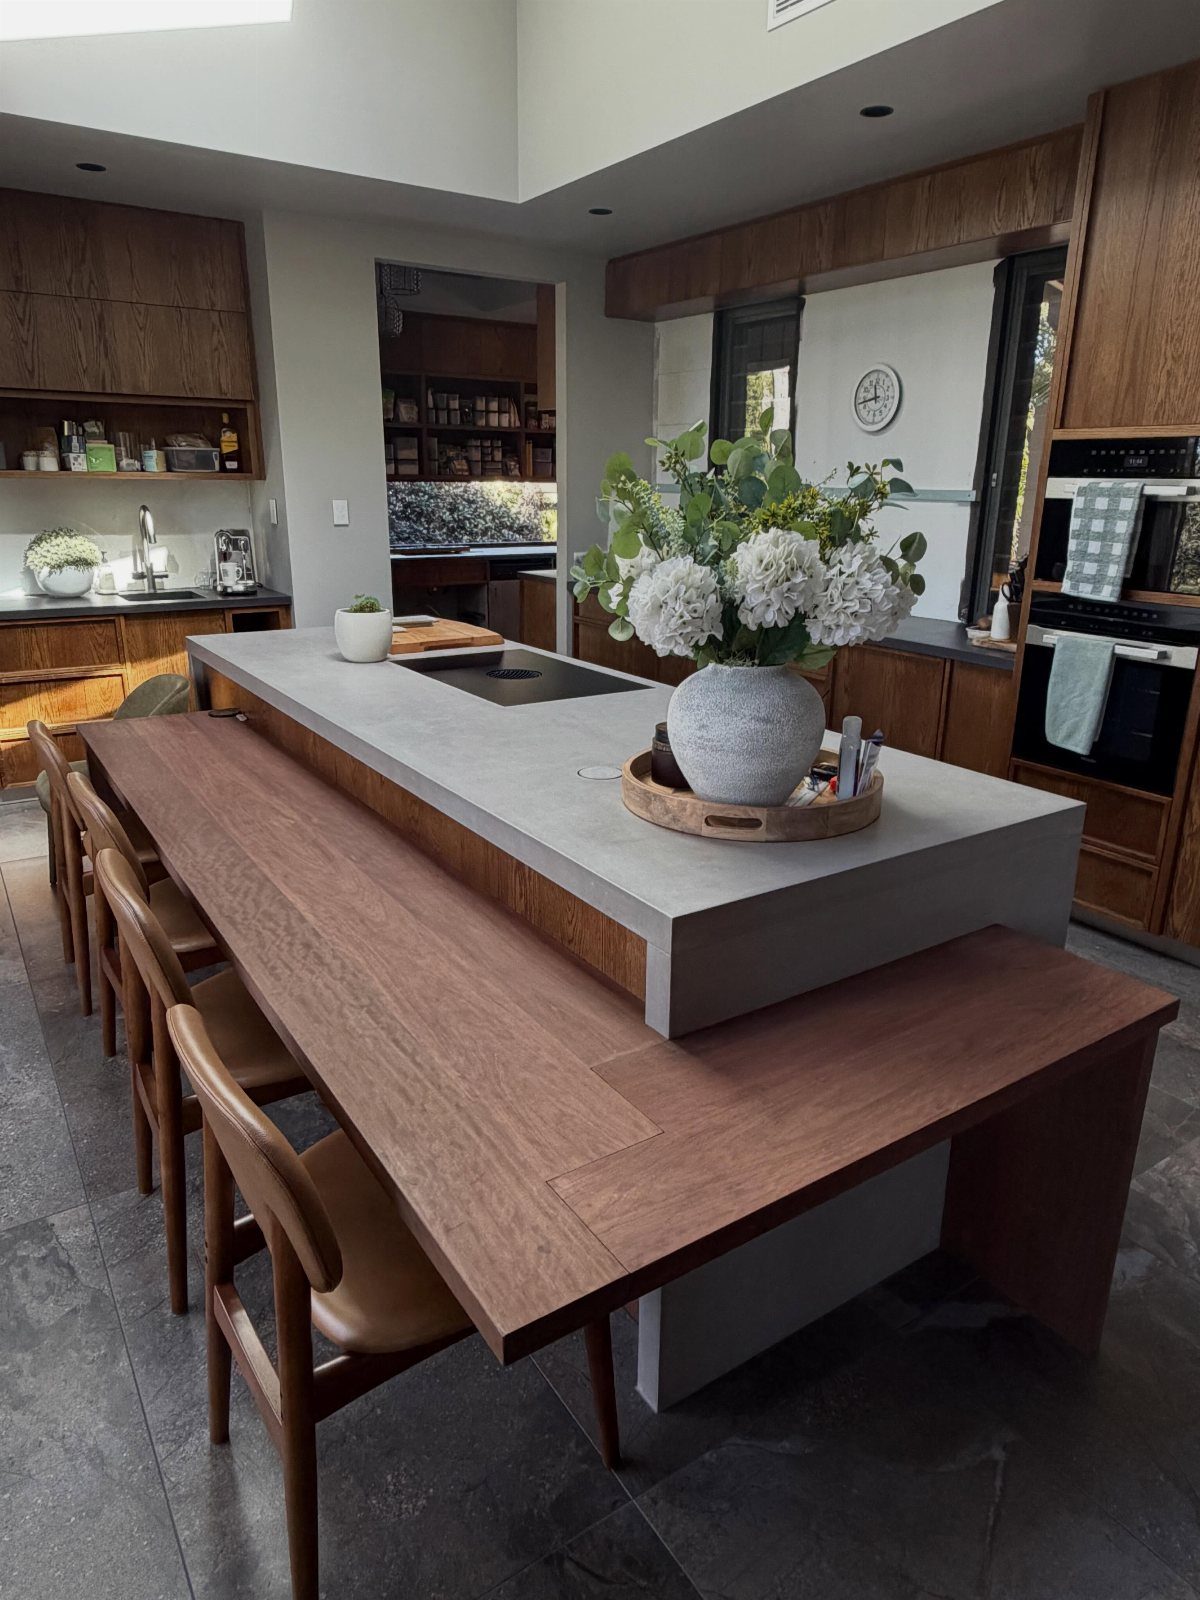
Dropping one end of the island to table height gives you seating with real chairs, so meals feel less like a quick stop at a counter.
The lowered section also doubles as a baking or homework surface that sits at a comfortable level for sitting.
Leather chairs and a wood top warm up cool concrete, and I would repeat that wood tone somewhere else in the room.
Allow enough space behind the chairs to pull them out without hitting the main work area. Expect extra fabrication cost for the step down.
6. L-shaped Island
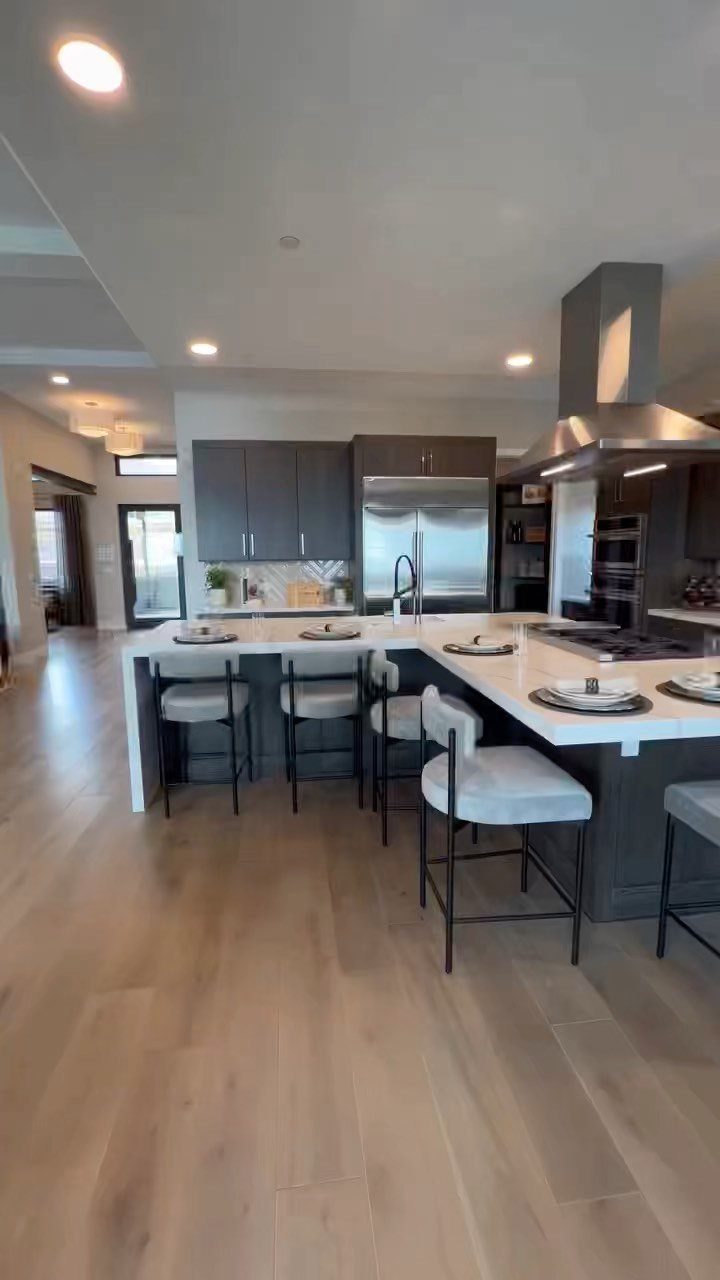
An L-shaped island gives you one long seating side and two working ends, so a cook can prep at the short leg while others sit along the long one. That separation keeps stool traffic out of the cooking zone.
The bend also makes a natural boundary between kitchen and living space in an open plan.
I would plan stools only along the long run and leave the corner as an open landing spot for groceries. Measure carefully, because an L eats more floor than a straight island of the same length.
7. Different Seating Shape
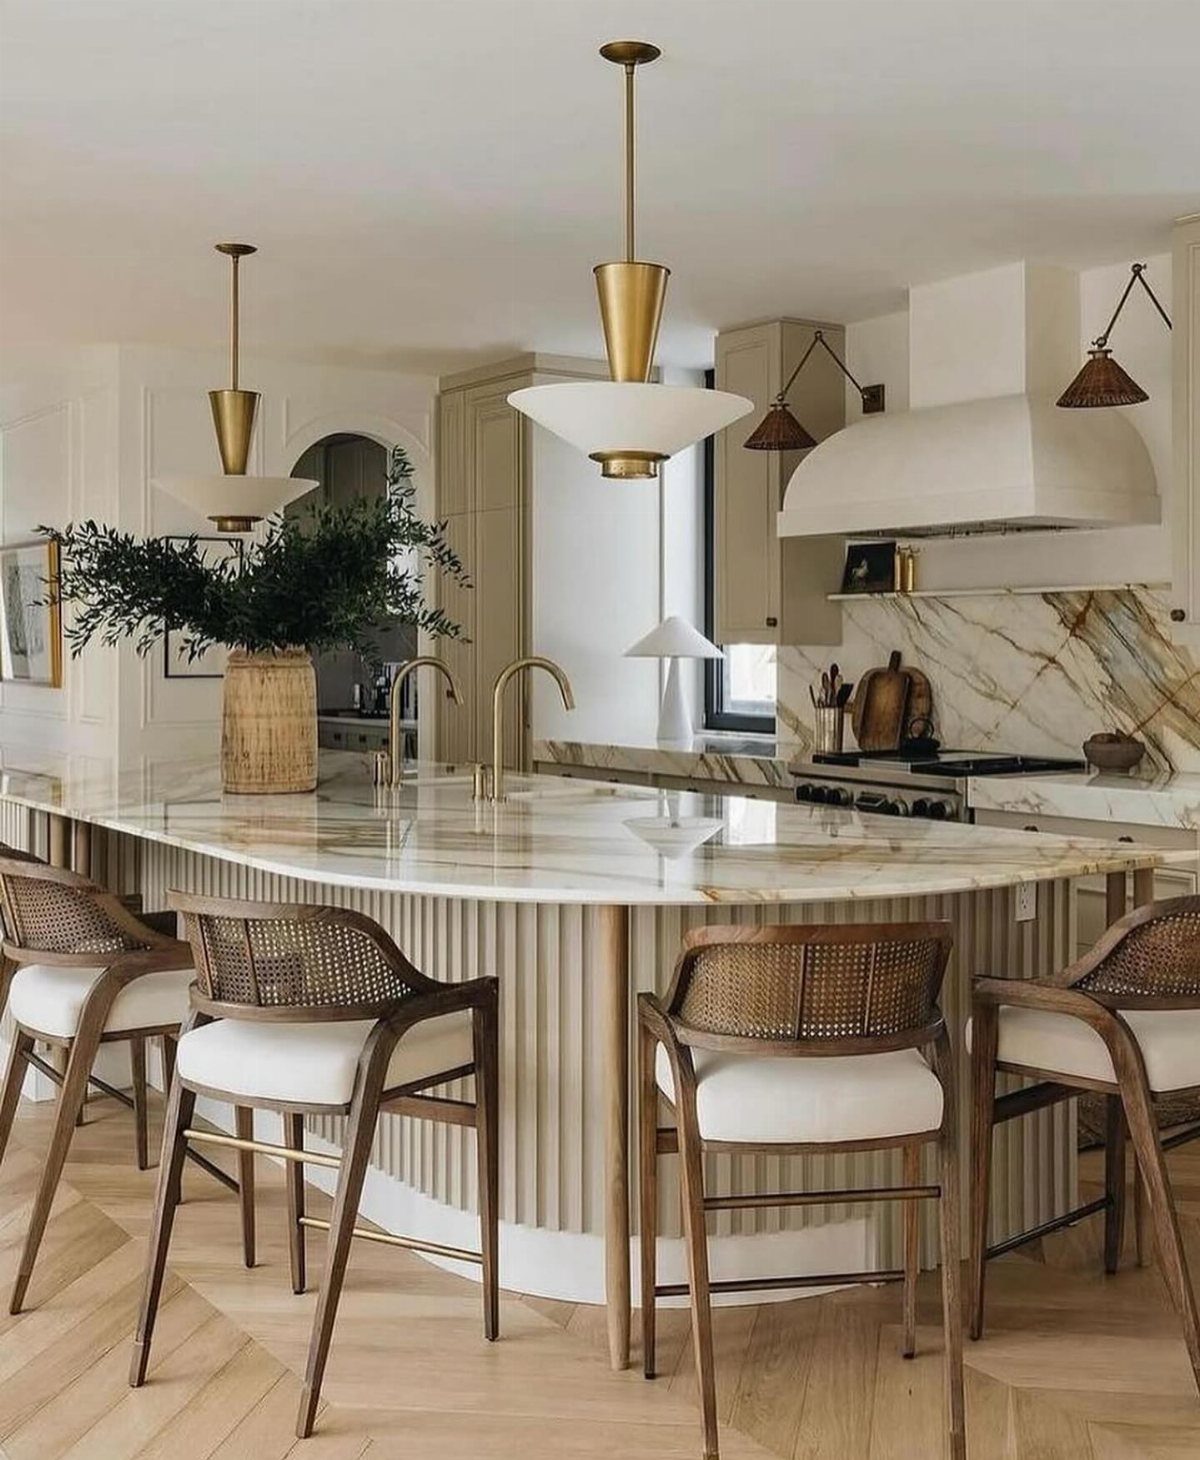
A curved end on a marble island softens the corner where hips and elbows tend to collide, and it gives the seating its own shape apart from the straight prep run.
I like that split: the flat length stays for chopping, and the round end becomes the place people drift toward.
Cane-back stools suit a curve well, since their open backs keep the shape from feeling crowded. Plan on a countertop template for the rounded edge, because stone cut to a curve usually costs more than a straight slab.
8. Double Kitchen Islands
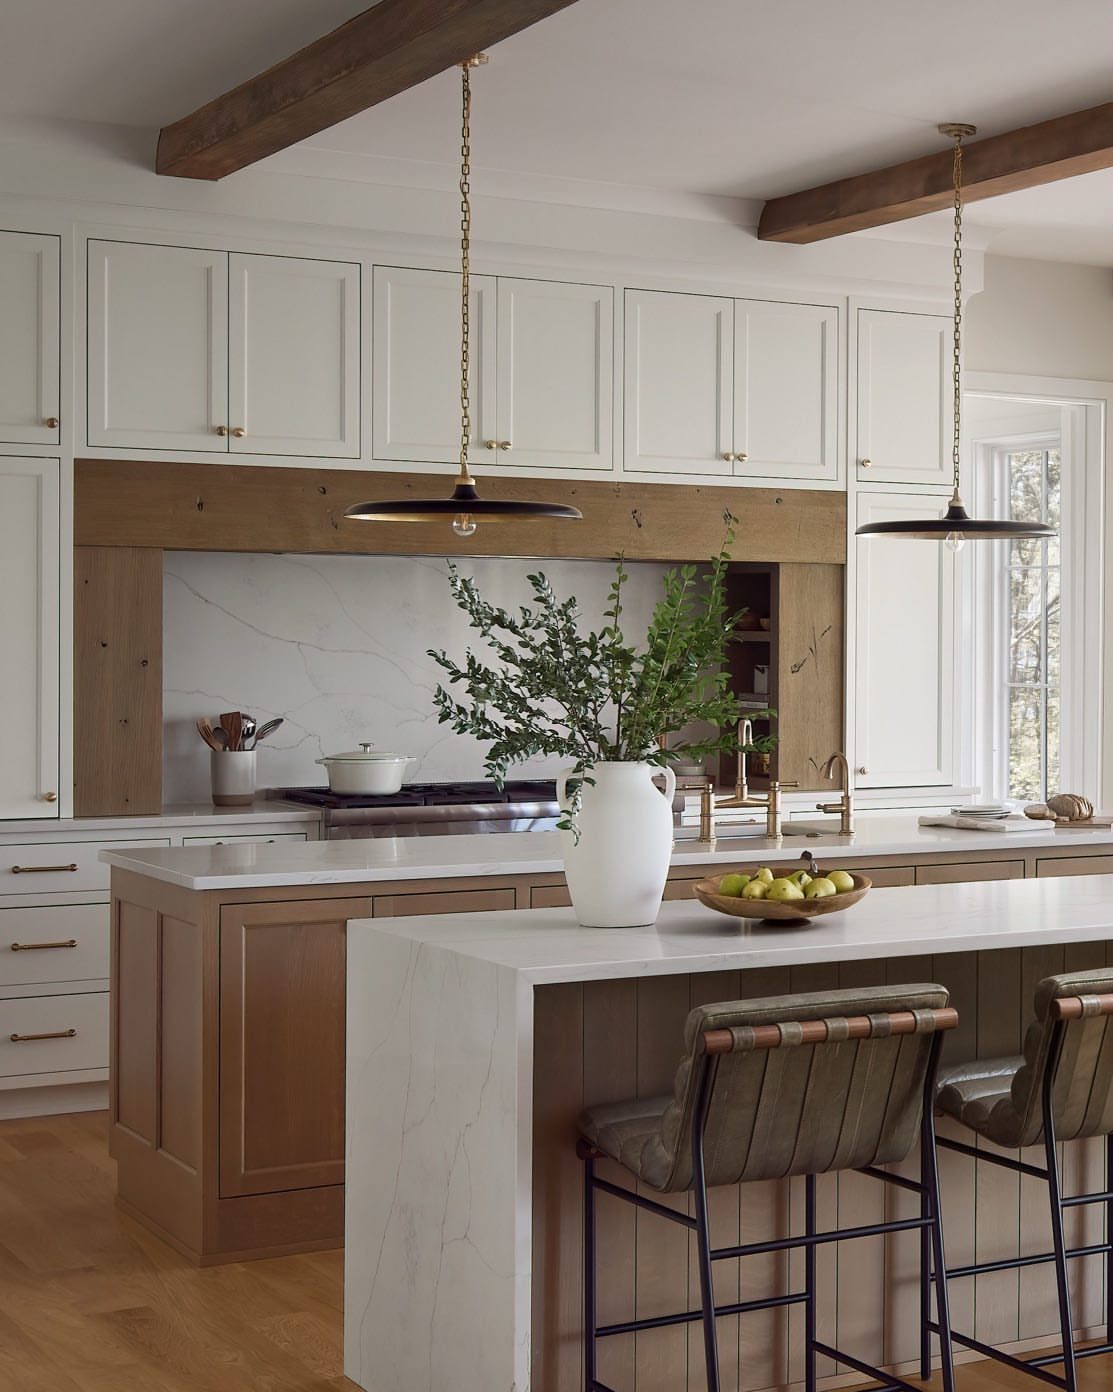
Pairing two islands with a walkway between them lets one carry the stools and the other take the prep, storage and a vase of greenery.
Guests settle at the seating island, and the cook keeps a clear workstation with no one reaching across.
I would pick this only for a large kitchen with space for walkways between the pair and around both.
In a mid-size room, one island with seating on two sides does the same job for less money. If you go double, match the tops so the pair reads as one plan.
9. Seating on Two Sides
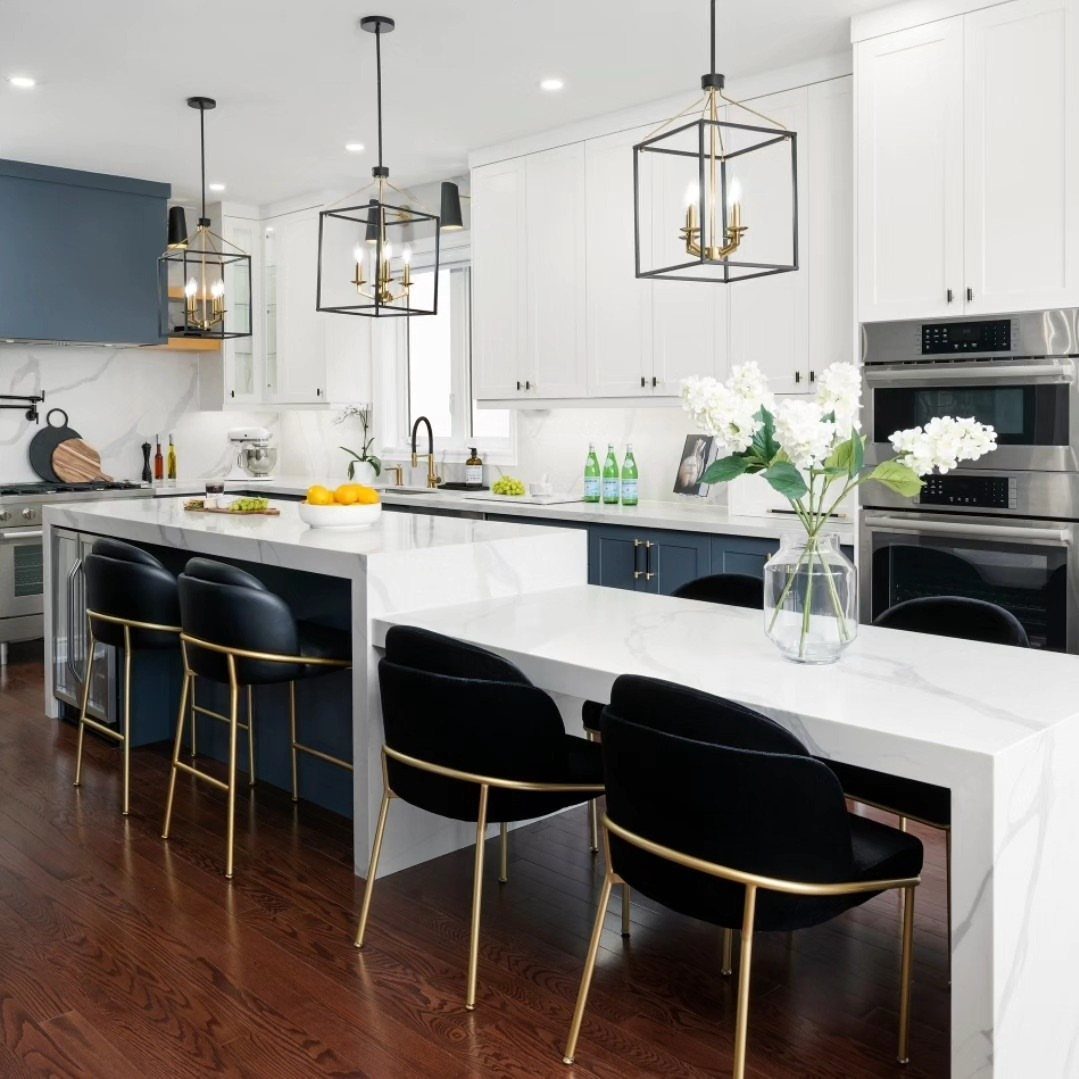
Stools on 2 sides of a waterfall island give you an L of seating without building anything extra.
The stone runs straight down the ends, so the overhangs on the seated sides stay clean and the whole piece looks like a single block.
I would choose stools that tuck fully beneath the counter, so the walkways stay open when nobody is sitting.
Black frames with gold accents add contrast against all that white marble. Waterfall ends cost more in stone and fabrication, so get that number into the budget early.
10. Rounded Island with Stools
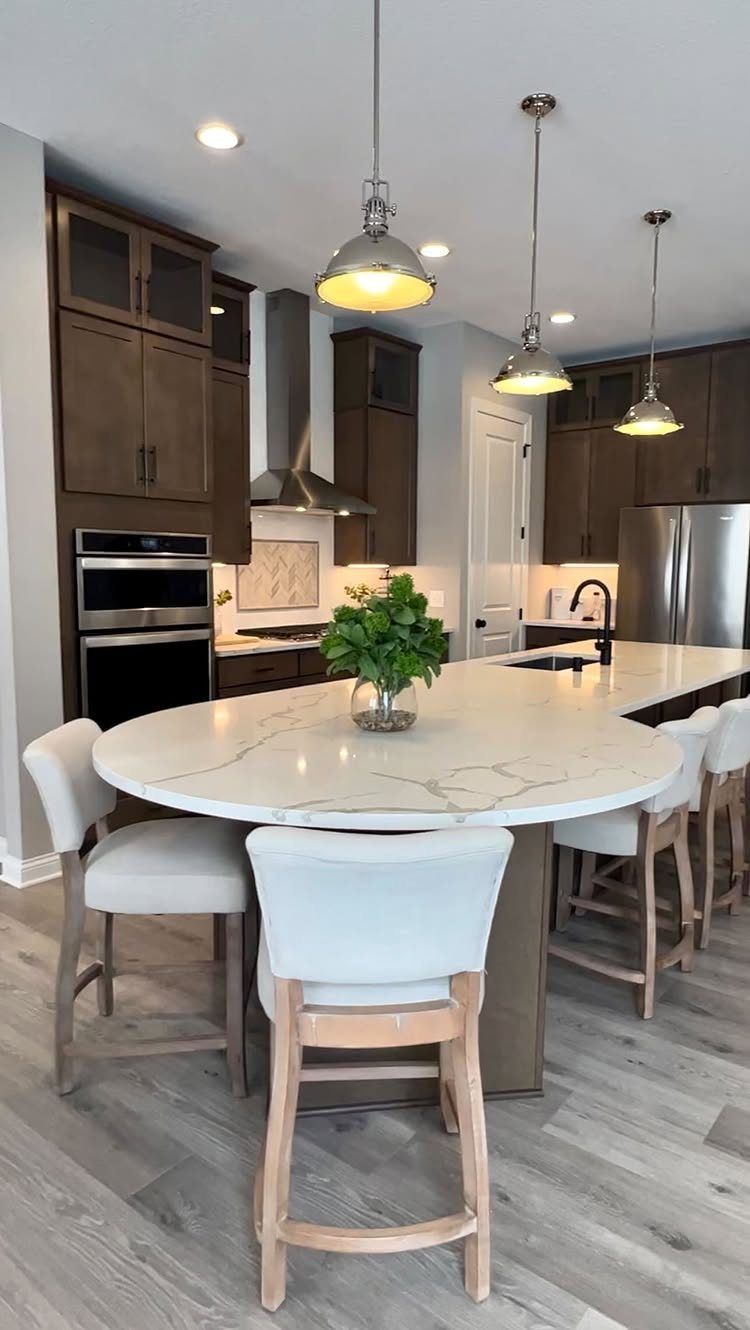
A rounded end takes the sharp corner out of a large island, which matters if kids or a tight walkway put people at hip height with the stone.
Upholstered stools on 2 sides make it a place to sit for a while, not just perch.
I would go with a wipeable fabric or vinyl on white seats, since they sit right beside the cooking.
Keep the pendants centered over the island so both seating sides get even light. A curved edge adds fabrication cost over a straight one.
Clearance and Overhang
Measure the room before you pick the island. Leave at least 42 inches on every working side, and 36–44 inches wherever people sit, so chairs can slide out and someone can still walk behind them.
In a tight kitchen, 36 inches behind the stools is the minimum, not a target. If the room can’t give you those numbers, shrink the island before you shrink the clearance.
Each seated side of the island needs a countertop that extends 12–15 inches past the cabinet base, or knees have nowhere to go.
On an island 36 inches wide, two 12-inch overhangs leave just 12 inches of counter between them, so go wider if you want real prep space in the middle. A length of at least 48 inches keeps the whole piece from feeling squeezed.
Island Seating Benefits
An island with seats does more jobs than any other piece in the kitchen: prep, meals, homework or laptop work, and a place for guests to stand and talk while you cook.
It can also fold dining into the kitchen, which matters if you have no separate eating area.
Decide which of those jobs you’ll do most before you design anything.
A household that mostly entertains needs more seats and open floor around them, while one that eats and works there daily needs a comfortable depth and a clear surface.
Choosing Island Configuration
Start with the floor space you actually have, then the prep area you can’t live without, then the number of seats. Those 3 answers narrow the choices quickly.
A bar-style island is the simplest option: a single run of counter that puts seating first.
A U-shaped island wraps the cook on several sides and needs the most room of the group, while a corner island suits kitchens where the layout already bends.
Check the clearance on all 4 sides of any freestanding island. If one side can’t meet it, attach that side to the cabinets and plan around the peninsula instead.
Frequently Asked Questions
What are some good cabinets for a kitchen island with seating?
Base cabinets set back under the countertop overhang work well, as long as the top extends 12–15 inches past them so knees fit.
Putting cabinets on the seating side suits things you reach for rarely, like seasonal items, or an appliance garage for gear you want out of sight.
That keeps the more convenient cabinets free for everyday use. White cabinets under a stone top that runs well past them also keep the island looking light.
Is a 12-inch overhang enough for seating?
Yes, 12 inches is the minimum for knee room, and 15 inches is more comfortable. Measure the overhang from the cabinet base to the edge of the counter.
With seating on both long sides, each 12-inch overhang takes a bite out of the top, so a 36-inch-wide island leaves just 12 inches of open counter in the center.
For a prep zone you can actually chop on, I’d widen the island to 42–48 inches.
What is it called when a kitchen island is connected to the wall?
It’s called a peninsula. Because one end is attached to the cabinet run, that side needs no walkway clearance, unlike a freestanding island that wants open floor all the way around.
That makes it a good fit for narrow kitchens. It does close off one walkway, so watch how people move through the room before you commit.